Homemade marinara. My goodness, I typed those two words and immediately my mouth started watering! It is such a treat especially when you bring it out in mid-winter and you get that zing of summer sweetness. If your mouth isn’t watering too, it can only mean you haven’t experienced the phenomenon of homemade tomato sauce yet. I’m sure you know the difference between home-grown tomatoes and grocery store tomatoes—well, it’s about the same between homemade marinara and grocery store tomato sauces.
I guess technically there is a difference between pomodoro sauce (even more precisely, “al pomodoro” sauce) and marinara. Specifically, marinara (“sailor-style” in Italian) is sauce that contains tomato and garlic, while pomodoro is tomato sauce that does not specify whether garlic is present or not. In all honesty, I didn’t know there was such a distinction until I did some research for this blog post, and I have always called my tomato sauce simply “marinara.” As luck would have it, I always do add a little garlic to my tomato sauce, and I did for this batch as well, so I’ll keep calling it marinara for today anyway. This year, July 21st (continuing into the wee hours of the 22nd) was Marinara Day. A lot of work but TOTALLY worth it.
Also, in case you didn’t know, marinara is useful for a lot more than just a spaghetti sauce. I use it often to make pizzas and as a dipping sauce, and indeed since I hate ketchup I substitute it instead. It can also be used as an ingredient in barbeque sauce, marinades, and to add flavor and body in casseroles. I’ll also take this sauce and augment it on the fly, making a carbonara by adding bacon, or making it into a marsala or vodka sauce, and thus spruce up my basic pasta dishes. To me, it is the queen of all ingredients.
My garden has been producing an abundance of tomatoes, by design. I planted 18 tomato plants this year and was hoping to produce at least 100 pounds of tomatoes. I think I’m going to finish close to that amount. And I have many varieties. I have Roma paste tomatoes that are specifically intended for making tomato sauce. But I also have a lot of slicer varieties, including a lot of Cherokee Purple, Big Boy, the yellow Lemon Boy, and the colorful Pineapple. These varieties are very wet and require a lot of reduction to make a thick tomato sauce. And there are some cherry types, which are best adapted for salads. These in turn are heavy on skin and seeds. The ones I have in hand today are not exactly the ones I would have chosen for marinara day, but I’ve eaten as many salads and tomato sandwiches as I can and it’s time to focus on food preservation. I observed tongue-in-cheek last year, with apologies to Donald Rumsfeld: “You make marinara with the tomatoes you have, not the tomatoes you wish you had.”
But of course, 100 pounds of tomatoes don’t all appear vine-ripe and ready on the same day. So that presents a bit of a challenge for canning, because it is very labor-intensive and I definitely didn’t want to can marinara many times in small batches. I really want to make marinara at most three times this summer, and preferably only twice.
The solution is to collect them up and freeze them. That might sound like an abuse of delicious fresh tomatoes, and it certainly would be if you thought you could thaw them out and use them on salads or sandwiches. But to make cooked tomato sauces, freezing does not compromise the quality very much. The vine-ripened sweetness and richness is not destroyed by freezing. It is true that some of the fresh tomato aroma is lost, but I made up for that by adding plenty of fresh tomatoes straight from the garden. There were about 35 pounds of frozen tomatoes I had collected over the previous four weeks, and another 15 or 20 pounds fresh that had been collected in the previous five days, and most of those were harvested that morning. I weighed the frozen tomatoes but not the fresh ones, but it was approximately 50 pounds.
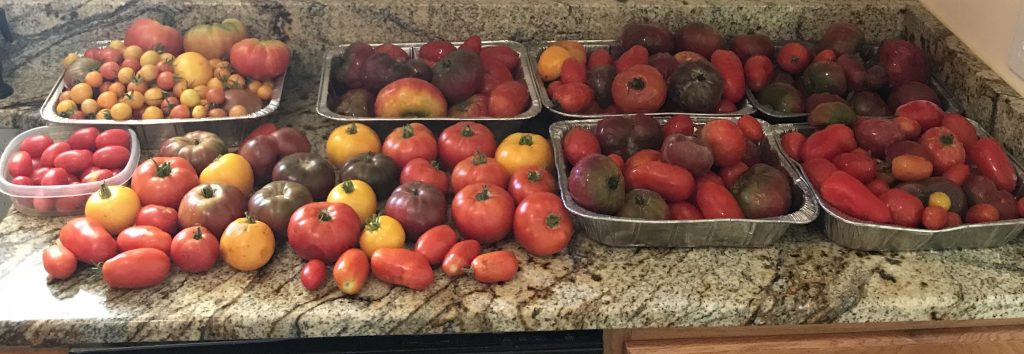
If you don’t have access to this kind of abundance, or if you want to supplement your garden bounty with some additional tomatoes, try going to the Farmer’s Market and asking the tomato vendors for rejects. They’ll often have tomatoes neatly stacked on their display tables for $2.50 / pound, but in the truck they’ll have misshapen ugly tomatoes that they’ll part with for $1 / pound or less. That’s what you want for cooking and canning. They taste just as good once they’re cooked, but they’re not as pretty and so people don’t want to buy them.
From my experience making marinara last year, I have some ratios in mind; basic “thumb rules” for estimating the expectations and yields. It goes like this: 10 pounds of tomatoes should produce about 1 pound of waste (skins, stems, and seeds) and 9 pounds of pulpy juice. Then that 9 pounds of juice will boil down to about 4 pounds = 2 quarts of marinara. Therefore if we’re calling this 50 pounds of tomatoes, I’m expecting to yield about 10 quarts of marinara.
After I was done with this project and while I was writing this up, I found guidance in the USDA Complete Guide to Home Canning volume on tomato products. This says a bushel (53 pounds) of tomatoes will produce between 10-12 quarts of thin sauce, and between 7-9 quarts of thick sauce. So I’m certainly in the ballpark.
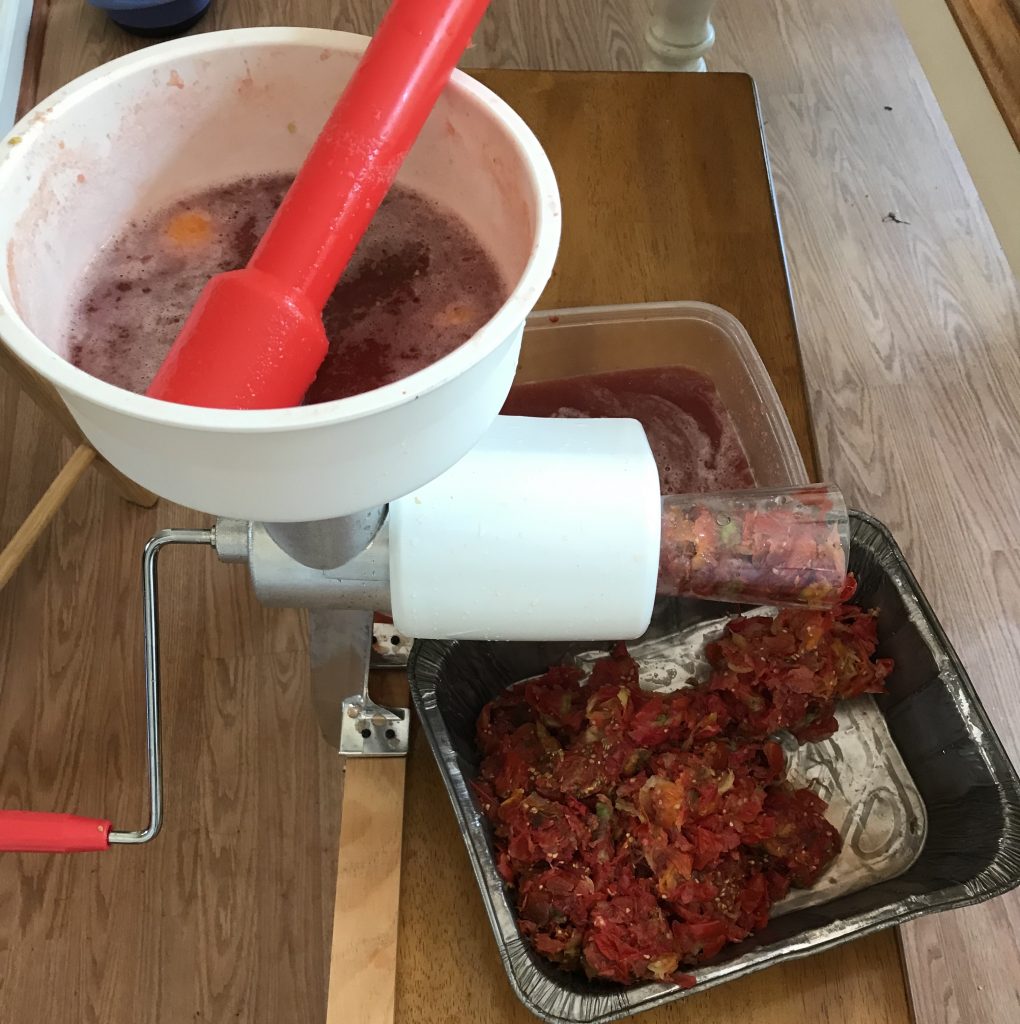
A very labor-intensive part of making tomato sauce is separating the juice from the skins and seeds. It can be done by blanching the tomatoes to remove the skins, and removing the seeds with a spoon or by hand. If you do it this way, budget plenty of time for it. It’s a pain! If you are going to blanch tomatoes (or any other fruit or vegetable), use a pot of boiling water and a pot of ice water. Drop the fruits into the boiling water for 1 minute, and then transfer them to the ice water. The goal is not to cook them, but to weaken the skins so they can be removed easily.
I did not use the blanching method. Instead I bought myself a food strainer / mill about two months ago, and I did have occasion to test it once before today. It has a crank that drives a screw, which pushes the tomatoes through the machine and the pulp out the end as the juice runs out the bottom and is directed to a tray by a trough. This machine saves a LOT of time. I actually found the machine worked slower than I expected, but after I was done I noticed I forgot to install a spring when I assembled the mill. So maybe next time it will be even more efficient.
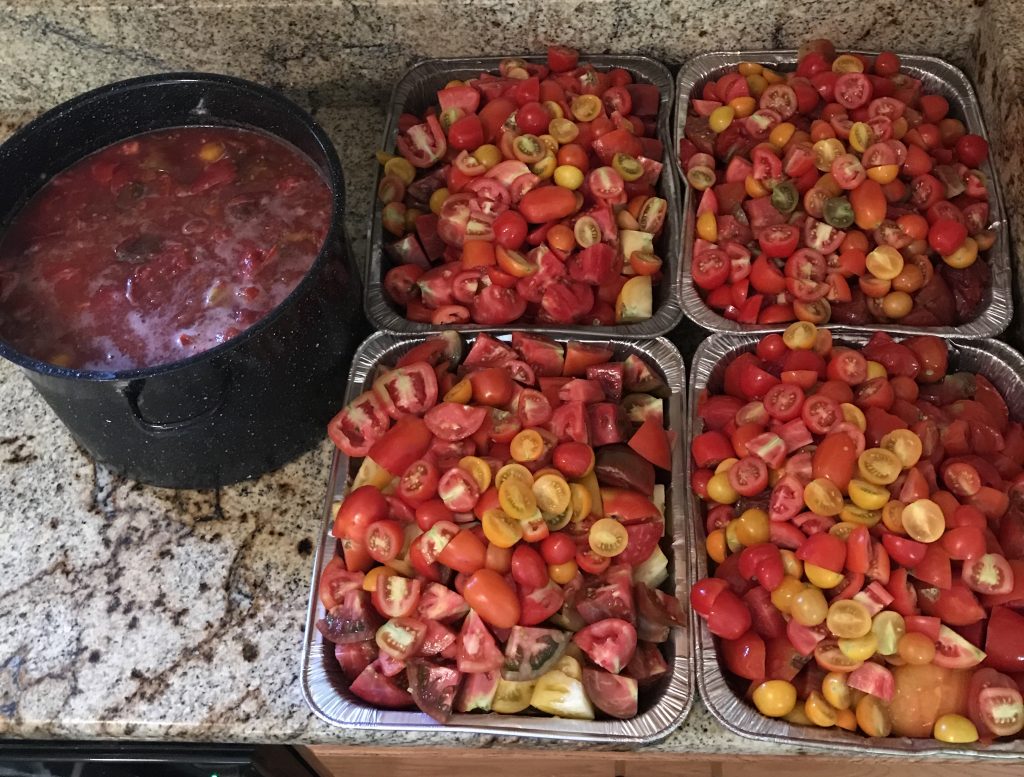
It is useful to remember that tomatoes are mostly water. The process is very wet and messy! It doesn’t show from any of the photos, but I had to take time to mop the floor which got all sticky from the juicing. By the time I was done I filled two stock pots and a slow cooker with tomato juice, and had two trays full of pulp. That is probably in the neighborhood of 25 quarts total, although I didn’t measure it. This juice is very thin and watery, and you’ll need to simmer it to thicken it up.
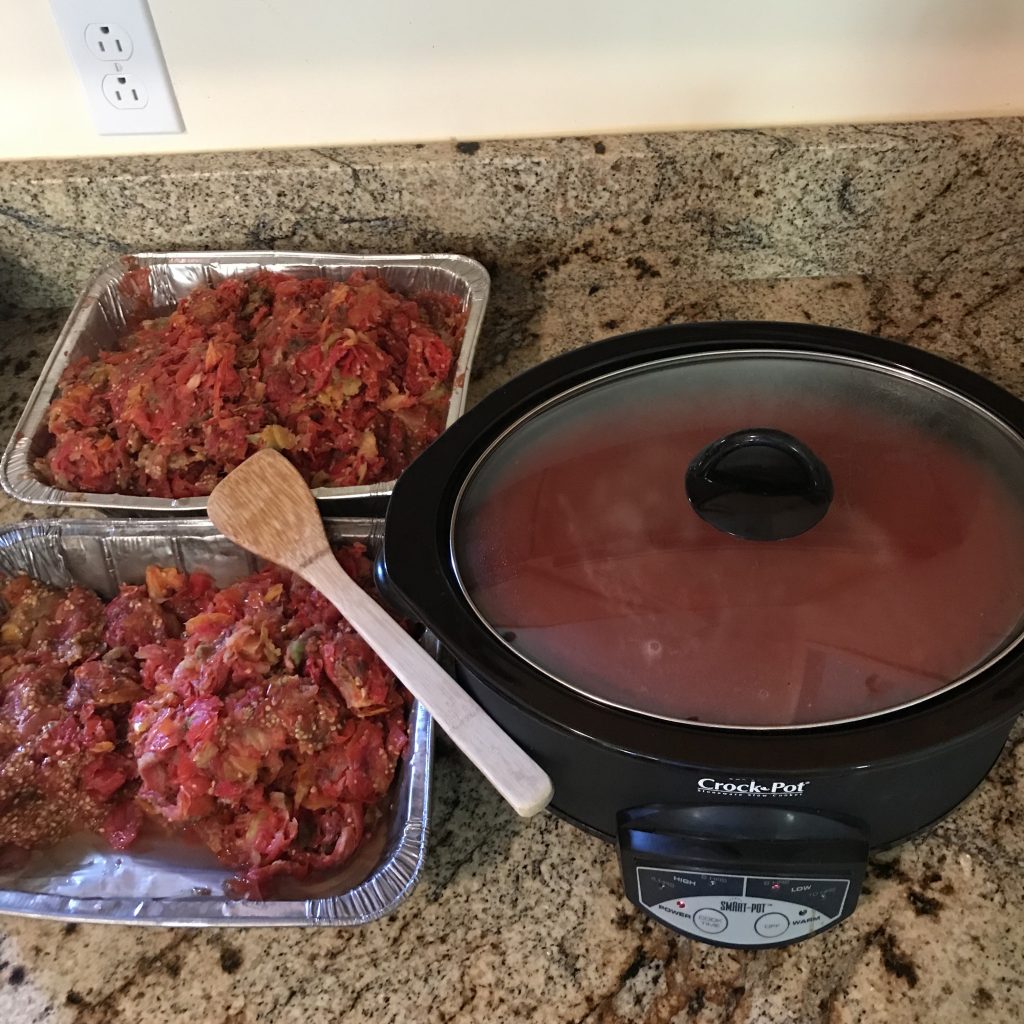
I actually did one further juicing step: I took that wet pulp and threw it in a “nut milk bag” and squeezed it to extract a bit more. I didn’t take pictures: trust me it’s not very glamorous to look at! I probably got another quart of juice and consolidated the pulp down to one tray. But the pulp had no value and I threw it away. I didn’t even try to compost it, because it was loaded with seeds.
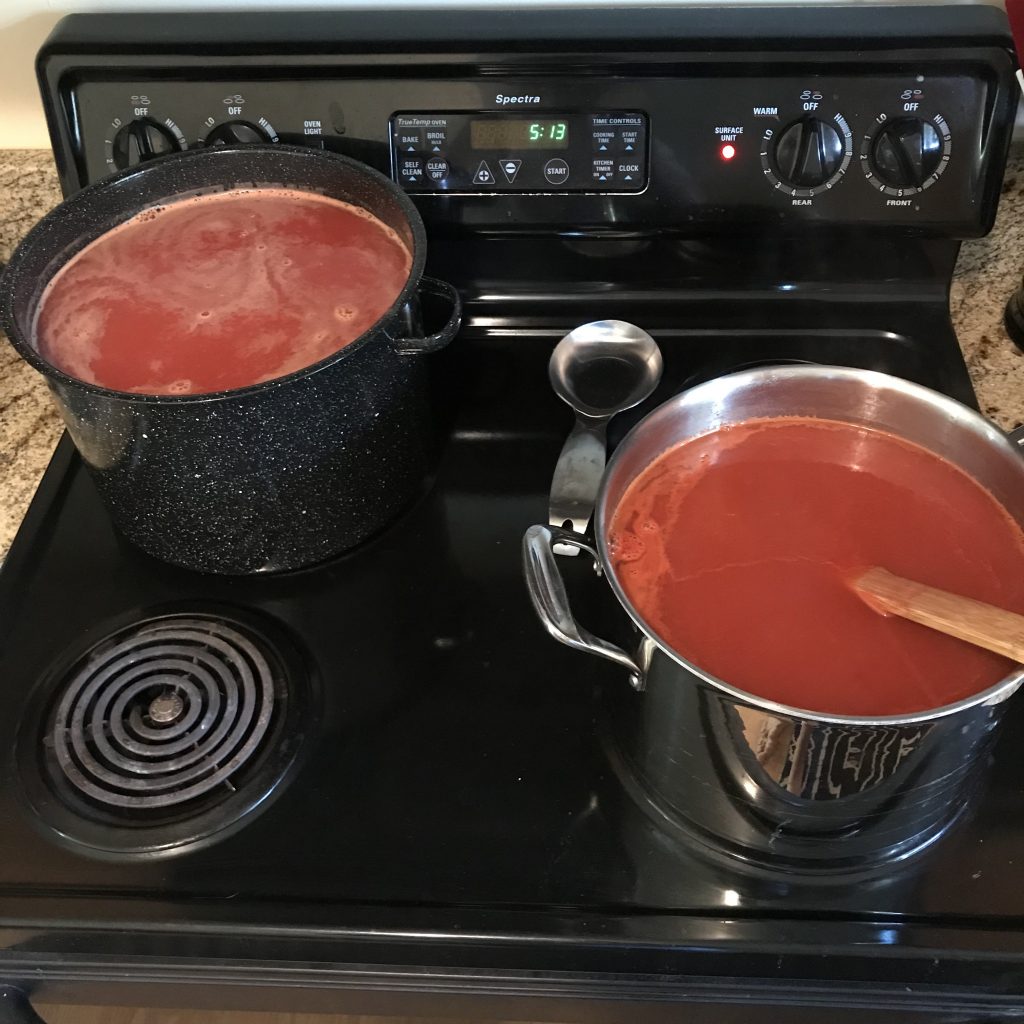
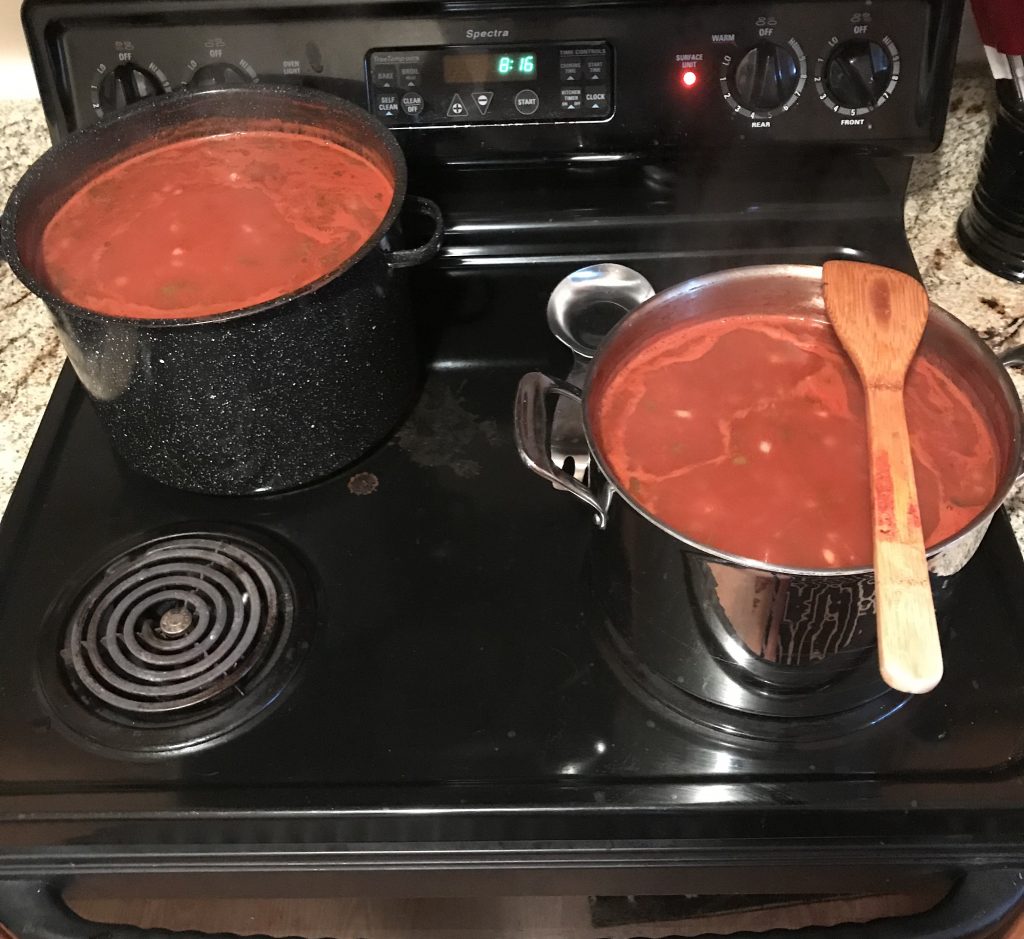
Notice in the picture the clock on the stove shows 5:13. The next part, simmering to reduce the water content, is very time consuming. There’s pretty much no better way to do it than to set the stove on medium and let it simmer very slowly. You could probably speed it up with higher heat, but you have to stand there and stir constantly or you risk burning it.
I added a few things to the sauce as it boiled down. I sauteed two large white onions, diced in olive oil. Not carmelized or browned, but just heated to translucent, and then added to the two pots. I also took about ten large garlic cloves (Aha! So it is authentic marinara!) and did the same thing. And lastly, I took about two cups of fresh basil out of the garden and pureed it in a blender with maybe a cup of water, and added that. That’s all the seasoning I added. I did not add salt or pepper, because some of the people in my household are sensitive to spicy and salty food, and it is easy enough to add to dishes on the back end. I also did not add any sugar. As you’ll see below, it is necessary to add citric acid to canned marinara, and the sourness can be offset with a bit of sugar. But this also can be added when the marinara is used as an ingredient, and so I decided not to presume that people will want the tanginess adjusted.
This is what the sauce looked like three hours later:
My father walked by at one point and commented “Chinoike Jigoku,” which is a reference to a trip we took together to Japan where we saw a hot spring of Beppu by that name, which literally means “bloody hell pond.” Of course, the pond gets its color from iron in the ground, not tomatoes!

Back to business. I continued to reduce the sauce and it got thicker and thicker. As the fluid level went down, I had to lower the heat to maintain a steady simmer. I probably walked over and stirred the pots about every 10 minutes, and around midnight they were roughly half full and I consolidated them to the black enamel stock pot.
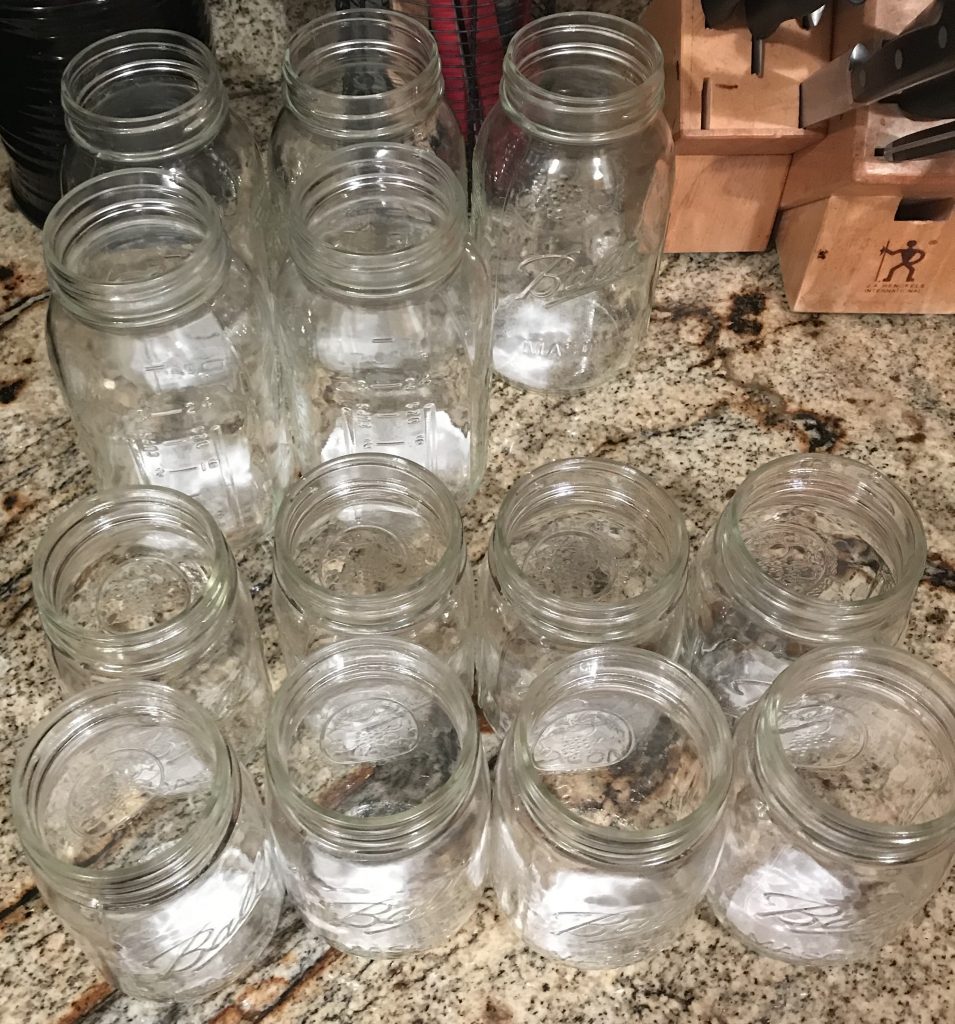
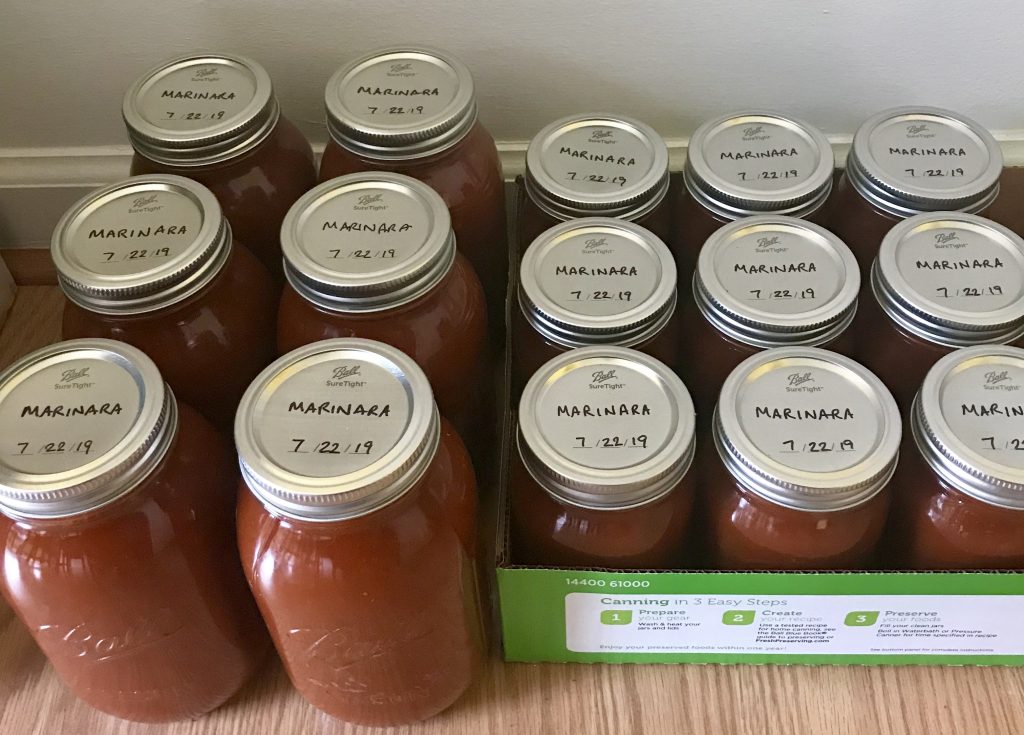
I thought there was about 9 quarts of sauce at this point, so I prepared five quart jars and eight pints. I used regular mouth jars, but wide mouth would be fine if that’s what you have handy. According to the National Center for Home Food Preservation, it is mandatory to add citric acid to the tomato sauce before hot canning, even if you use a pressure canner. I definitely recommend you read some of the theory of canning safety and that you follow approved and updated recipes. In this next photo you can see the jars I prepared with citric acid in the bottom.
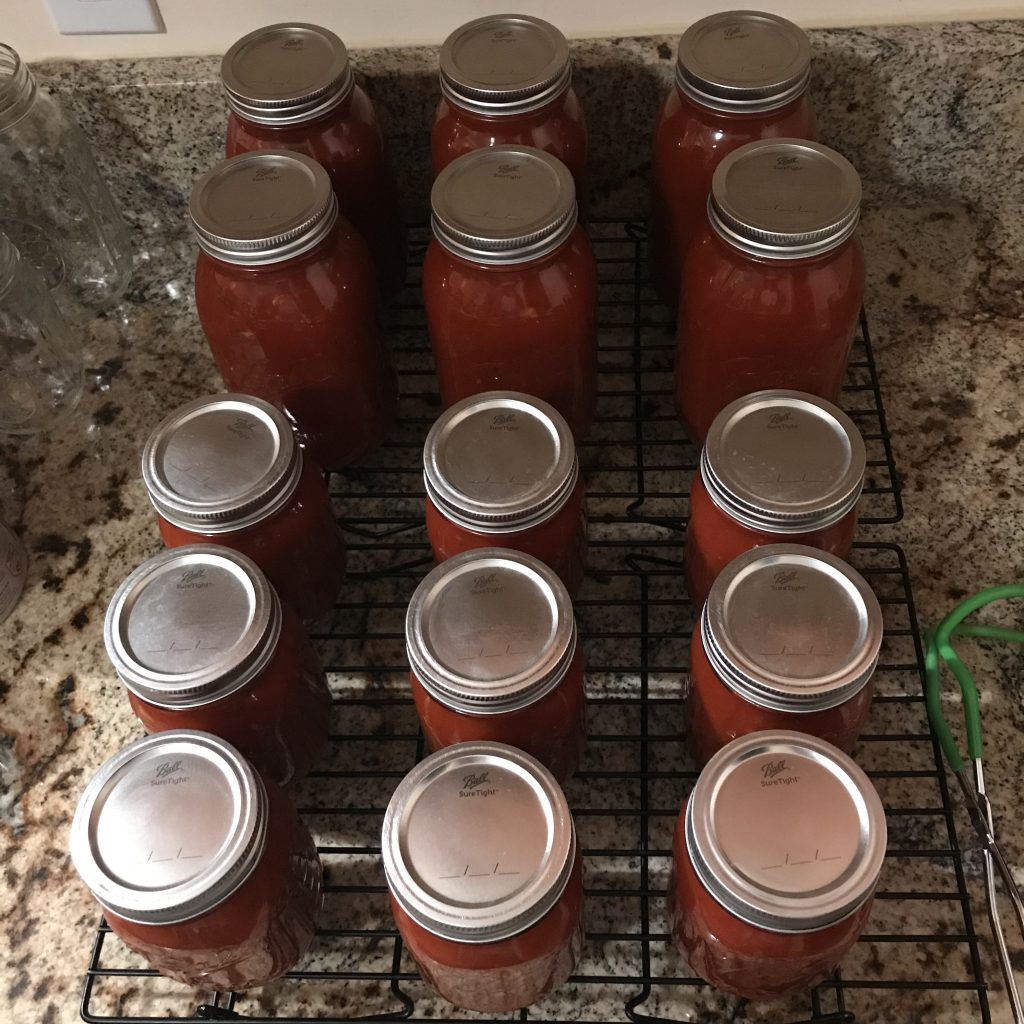
I then ladled the sauce into the jars, leaving ½-inch headspace in each. After setting up all of these jars, I found there was still quite a bit of sauce left, so I prepared another quart and another pint jar, and found to my amazement that I precisely filled all jars exactly to the ½-inch level. Thus the yield was exactly 10½ quarts, which is about what I expected for 50+ pounds of fruit.
The only thing left to do is the hot canning. I have another stock pot I use for water bath canning. There is a pedestal that sits on the bottom and raises the jars up from the bottom of the stock pot by about two inches. This then prevents the jars from getting very close to the heat of the burners, which could thermal stress crack the jars. It is very similar to any water bath canner you might buy, and I started processing the jars about 1:00 AM. The requirements for water bath canning is 40 minutes for quart jars and 35 minutes for pint jars. So it took another 2.5 hours, and I was finally done about 3:30 AM.
Some people are suggesting I should make other canned tomato products, including salsa, homemade ketchup, soups, or stewed/chunked tomatoes. These are very good ideas, but I’m probably not going to end up making other tomato products this year, and here’s why. I find that I use marinara a LOT when I’m cooking, as I described above. I would very much like to make about 30 quarts of marinara to have in inventory, which translates into 2½ quarts per month until the next years’ Marinara Day. I don’t actually believe I’ll get enough tomatoes to do this this year (recall I expect a total yield of 100 pounds of tomatoes) together with all the tomatoes I use on salads, sandwiches, and that I give away to family and friends. As long as I have not made my quota of marinara, I’m not planning to branch out to other preserved tomato products this year.
Final notes:
1. I was impressed with the richness of the tomato flavor. Sweet, aromatic, delicious! This is a good sauce, and better than the marinara I made last year.
2. Look at that deep rich red color! I think that is primarily because of all the Cherokee Purple tomatoes that went into this.
3. This recipe is time-intensive, but not all of that time is labor-intensive. Certainly milling and juicing was a lot of work over about five hours. Once the simmering begins, you come back to stir the pots every 10 minutes or so (I set a timer on my phone). And then while processing the jars you need to come back every 40 minutes. Since this was way past my bedtime, I set an alarm and dozed on the couch while the jars were boiling.
4. This recipe is entirely vegan, in case that is important to you. One of my family members keeps vegan, so I try to to keep my canned vegetables vegan when possible.
5. This canning recipe is supposed to be shelf-stable for 12 months, although they claim best quality is within six months. But ten quarts isn’t going to last six months around here anyway.
So what do you think? If you try this yourself, please leave a comment and share your experience (good or bad). And feel free to ask any questions!
Canned Garden Marinara Sauce
Yield: About 10 quarts
50 pounds tomatoes, cut into chunks
2 large white onions, diced
10 large garlic cloves, minced
2 cups fresh basil leaves
Olive oil for sautéing
Canning jars, new lids, and rings (quarts or pints)
Citric acid for canning
Separate the tomato juice from the skins, stems, and seeds using the method described above or any other method of your choice, yielding 25-30 quarts of thin tomato juice. Discard the pulp. Simmer the juice for several hours to reduce to about 10 quarts.
While the sauce is simmering, sauté the onions and garlic and add to the sauce. Puree the basil in a blender or food processor (add about a cup of water to help it blend better) and add this to the sauce. If desired, season with salt, sugar, and other spices to taste.
Sanitize and dry the canning jars and lids. Add ½ tsp citric acid to each quart jar, and ¼ tsp to each pint jar.
Ladle the (hot) sauce into the jars, leaving ½ inch of headspace at the top of each jar. Wipe the rims with a wet paper towel. Cover with lids and twist on the rings finger tight (they should not be super tight because air needs to escape during the canning process).
Process quarts 40 minutes and pints 35 minutes in boiling water bath canner (start the timer after the water boils). Remove jars from water and let cool undisturbed 24 hours. Verify the lids have popped down and that vacuum has formed. Remove rings and test seals by lifting the jar off the ground with one hand touching only the edge of the lid. Store jars without rings in a cool location out of sunlight up to 12 months.
Question- why store it without the rings?
That’s a great question. So interesting in fact that it might deserve its own blog post! Here’s a summary answer. The first thing to know is that the ring does not hold the seal together after it is formed. The lid has a wax rim that sticks down onto the lip of the jar to form the seal, and if the ring is holding the thing together it is not sealed and not safe. The National Center for Home Food Preservation recommends removing the rings because it could prevent you from detecting a seal failure, and because moisture can get trapped inside the ring and cause corrosion of the lid. In addition, I favor removing the rings for two more reasons: First, I don’t want that many rings! Removing them makes them available to be reused every time I want to can something. And lastly, I find that jars stack a bit better if the rings are removed.