Authors Note: After writing this up, I looked it over and thought it ran really long. So I’m sorry about that, and of course you can just look at the pictures and skip down to the bottom to see the recipe. But I’ve been asked just about every subject in this blog post, and that’s why I wrote about it all. I hope you’ll at least skim through to see if I might answer something that puzzled you, or if there are any nuggets of insight you can use, picked up over 25 years of making bread.
Here’s a question I get a lot: How do you make such good bread?
I laugh sometimes about how many people seem to be impressed that I bake all my own bread. I think two generations before me, most families made most or all of their own bread, and looking one generation up I think everybody knew how to make bread but mostly didn’t. And now looking at my generation, I think most people don’t know how to make bread, and as I talk to my kids’ friends I have the impression that many of them don’t even know what bread is made of! So there’s definitely a lost-lore thing happening here, and I think that’s a bit sad.
And yet, everyone who comes over to eat immediately asks how I do it! Most also tell me a tale of woe, how they’ve tried to make bread but can’t get the hang of it. And maybe there is a resurgence; a bit of enthusiasm toward old-fashioned food lately. I’m guessing if you’ve read this far you probably don’t want the art to get lost—and I can tell you that my kids certainly know how to make bread. I’m glad we’re doing our part, anyway!
The bread I’m going to talk about in this article is a basic white sandwich bread. It turns out to be the bread I make most often (and about once a week nowadays), because my family loves it and it is the most practical and useful form of bread for our lifestyle. I used to make whole wheat bread but people just didn’t eat it as much and it would go bad and get thrown away. As described here, it is vegan and non-GMO, but it is not low-cal, not low-carb, and not gluten-free. Of course my kids often cut a two-inch chunk off of the loaf of sandwich bread and eat it plain, and it’s pretty tasty on its own. But we can also use it to make sandwiches of all kinds, or toast, or maybe a French toast for breakfast. It has a very uniform consistency and a smooth, tight crumb. So if you spread mayo or butter on it, it holds up well and wet ingredients like fruit jellies don’t leak through. There’s not much evolution or variation to this recipe any more—I’ve done it more or less the same for the last 20 years and it’s just the way we seem to like it.
As it happens, I often make this same dough and use it to make dinner rolls and baguettes, and sometimes homemade pizza. It’s pretty versatile. I have some muscle-memory associated with it and I can do other things while making it, like listen to audiobooks or podcasts, or talk on the phone. I suppose the first few times you make it you’ll be concentrating, but if you do it a few times it gets pretty intuitive, and the recipe is really forgiving—you could probably halve or double most ingredients and it’s no big deal. (Full disclosure: I don’t measure anything while making bread, and I had to “reverse engineer” what I do in order to write this recipe for you.)
I don’t generally freeze or refrigerate the dough, because while it takes a certain minimum amount of time (three hours from start to finish), it’s also forgiving if the time goes long. Sometimes I start the dough at ten in the morning and get busy doing other things and forget about it until six o’clock. Even then, it’s pretty much fine, maybe even more flavorful. It’s a pretty relaxed process, and I find it kind of relaxing to do.
Now we’re going to be working this with our hands for a long time, so obviously you will want to have clean hands, and also a nice clean counter before starting. I also habitually strip down to my tee shirt—don’t worry, this isn’t going to get weird or anything! Flour has a tendency to go everywhere and I like to keep it off my shirts. It’s also a bit strenuous to knead the dough. I’m not going to be dripping with sweat at the end or anything, but there’s not much reason to be wearing a nice shirt while doing it. I also have longer hair these days, so I put on a ballcap to keep it out of my eyes and also out of the food.
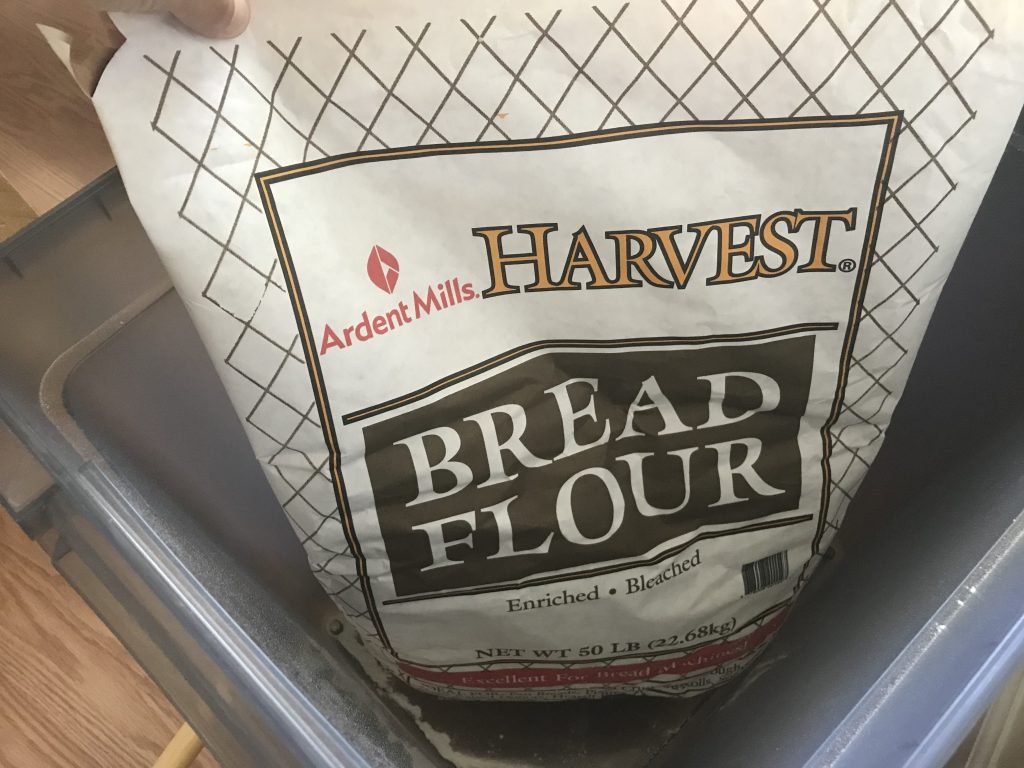
Okay, so it all starts with the flour. “Bread flour” is the name we use in the United States for “strong flour”: high protein content between 12% to 15%, and maybe a slightly coarser grind than all-purpose flour. Of course “protein” means “wheat gluten” and some people will part company with us at this point. I am sorry I have nothing for you if gluten is unacceptable to you, because it is a principal and inescapable part of the rest of this story. For the last five or six years, I’ve been using this Ardent Mills Bread Flour. I get it from Costco and it costs $15 for a 50-pound bag. It’s very economical that way, and quite honestly I think it is an outstanding product. It performs as well for me as any King Arthur flour which is going to cost you nearly a dollar a pound, and even store brand flour is going to cost maybe 50 or 60 cents a pound.
This is a good point in the story to go off on a bit of a tangent, but I think it is very important for people to understand about baking bread, and really about many kinds of home cooking. I make a distinction between novelty cooking and lifestyle cooking. So what’s that all about? Novelty cooking is when you make something a few times a year, mainly for fun. An example is how I make fruit pies for dessert once in a while, maybe six times a year, especially around Thanksgiving or Christmas. On the other hand, lifestyle cooking is when you make something regularly as a household staple. You might not have anything like that in your lifestyle right now, and that’s fine.
But if you’re thinking about changing your lifestyle and make most or all of your family’s bread, you need a few things to happen. I won’t go into a lot of detail here, but among other things you’ll need to streamline the process to make it time efficient, and you’ll need to control costs. If these two things don’t happen you’ll give up on it. If this were a novelty thing, I wouldn’t care much about the cost of flour unless it were way out there. Those pies I make for Christmas might cost me $12 apiece to make, I have no idea, but I do it for the enjoyment of it even if I could buy them for $6 at the store. But because this is where all our bread comes from, I need to know if I’m doing at least as well as the Arnold’s or Pepperidge Farm bread I could be buying instead.
Anyway, back to the task at hand. I actually really like this Ardent Mills bread flour, and I’ll use it to bake brownies, cookies, pie crust, to thicken stews and soups, I even make my pasta fresca out of it; really anything except cakes. Now it is a ConAgra product, apparently enriched and bleached too. So some more snobbish foodies might be turning your noses up at this. That’s fine and all; I definitely get that. I have also experimented with various and ancient grains like spelt and einkorn, hand-milled flour from wheat berries, various different artisanal bread types, and all of that. I’ve made a lot of different breads. This might not be Cadillac stuff here, but like I said, I think this performs as good as King Arthur bread flour, and I did a little research and made sure it is made in the USA and non-GMO. I happen to think it’s a great and economical choice for a lot of uses, and the bread is always tasty and my family loves it.
If you’re thinking 50 pounds of flour sounds unmanageable, here are some practical tips. First, I keep it in a plastic tub designed for dog food, with caster wheels and a gasket around the lid. Whenever I finish up this bag of flour I’ll take the tub outside and rinse it out with a garden hose, let it dry in the sun, and drop the new bag in. Easy peasy. Second, I have never had problems with weevils or bugs getting into it storing it this way. Third, based on the lifestyle I’ve described it lasts about a year, and I haven’t had any problems with the flour going rancid over that time.
Alright, so how much bread are we going to make? I routinely make two loaves per batch, and that’s what I’ll write the recipe for. The bread pans I use are by Pampered Chef and they’re still available, called the Stoneware Loaf Pan. I think mine are about 15 years old, and I really love them. They have great heat retention and I’ll be honest: I have never washed them. Maybe that’s a bit like seasoned cast iron cookware … or maybe I’m just lazy! I just scrape out any extra crumbs from the last batch, and bake the next round. If that grosses you out, go ahead and wash your pans, it won’t hurt anything. You can also use any so-called “9-inch loaf” pans, including Pyrex glass, or non-stick steel, or whatever. I suppose you can even get those disposable aluminum pans if you’re making this to take to a potluck or something, but then you might need to watch the bake time or temp more carefully.
Now the amount of flour is not actually precisely determined, but it’s going to be about 5 cups. Here’s how it works: I’m going to mix up all the other ingredients with about 4½ cups of flour, turn it out on the counter, and then add more flour little by little while kneading until it “feels” right. You should also know that different flours measure up differently as well. It’s about the same for King Arthur bread flour, but if you use a Pillsbury all-purpose flour it might be more like 6 or even 6½ cups. But this is going to be 5, maybe 5½ cups.
Next, I’ll want some warm water. I take a regular glass measuring cup and draw a “long pint,” which means just a bit more than a pint. Don’t stress out about it, I tend to measure everything generously. Make it 2¼ cups if you want to be precise. To make it warm, I put it in the microwave one minute. I think I’ve measured the temperature to be about 120-130, and when I mix it up with the other ingredients it’ll end up around 100-ish. You could even leave it cold, it doesn’t matter. Warming the water up makes the yeast work better, and as long as it doesn’t burn your hands it’s fine.
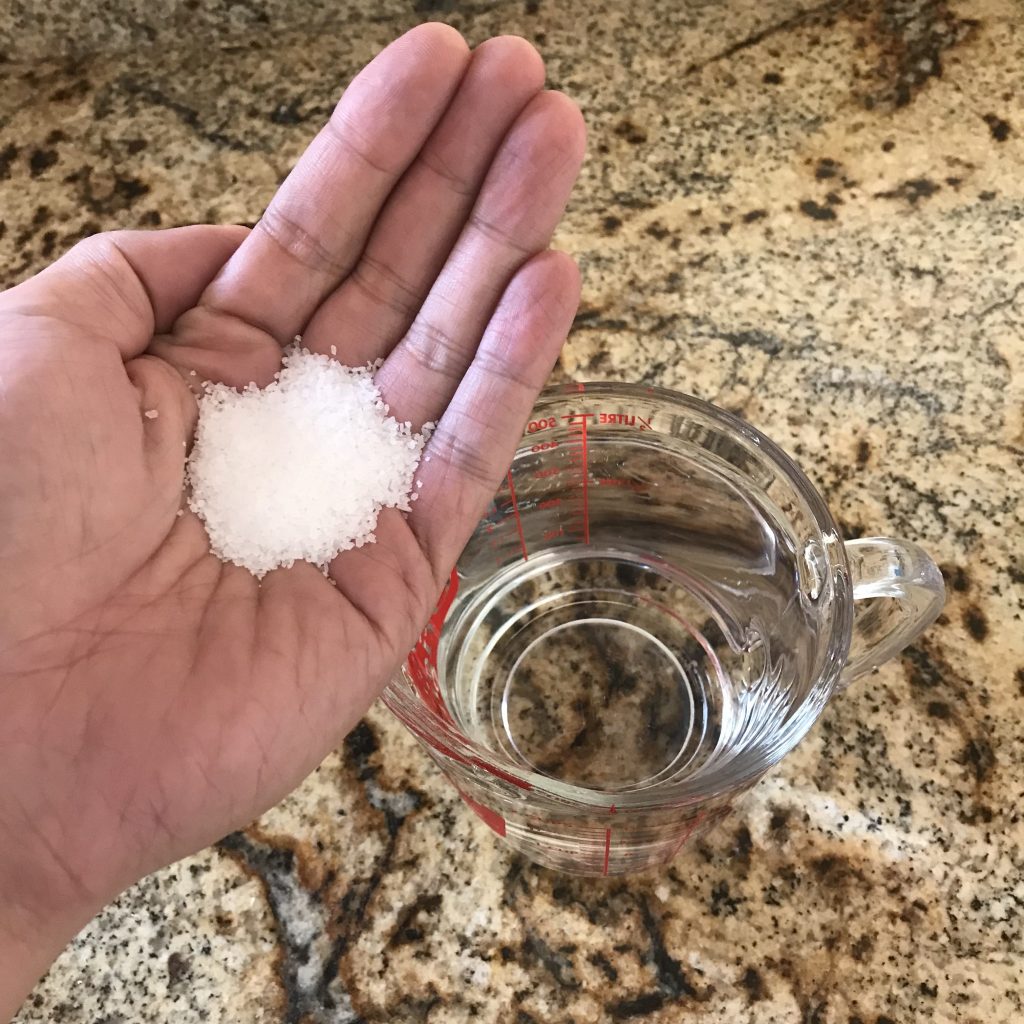
To the 4½ cups flour I add 1 Tbsp salt, 1 Tbsp yeast, and ⅓ cup sugar. If you’re using packets of yeast, use one packet. I can’t tell the difference in performance between normal and quick-rise yeast. (I don’t “proof” the yeast because I’ve never once had a failure to rise.) And you can change up the amount of sugar. I’ve increased the sugar over the years because it reduces the rise time and makes the bread fluffier, which my family seems to prefer. You can also use brown sugar, honey, maple syrup, add back some molasses, however you want to do it. I use “sugar in the raw” that isn’t perfectly white but kind of cream colored. I haven’t noticed it makes much difference in the flavor or behavior whatever you use, as long as it actually has some real sugars in it to feed the yeast.
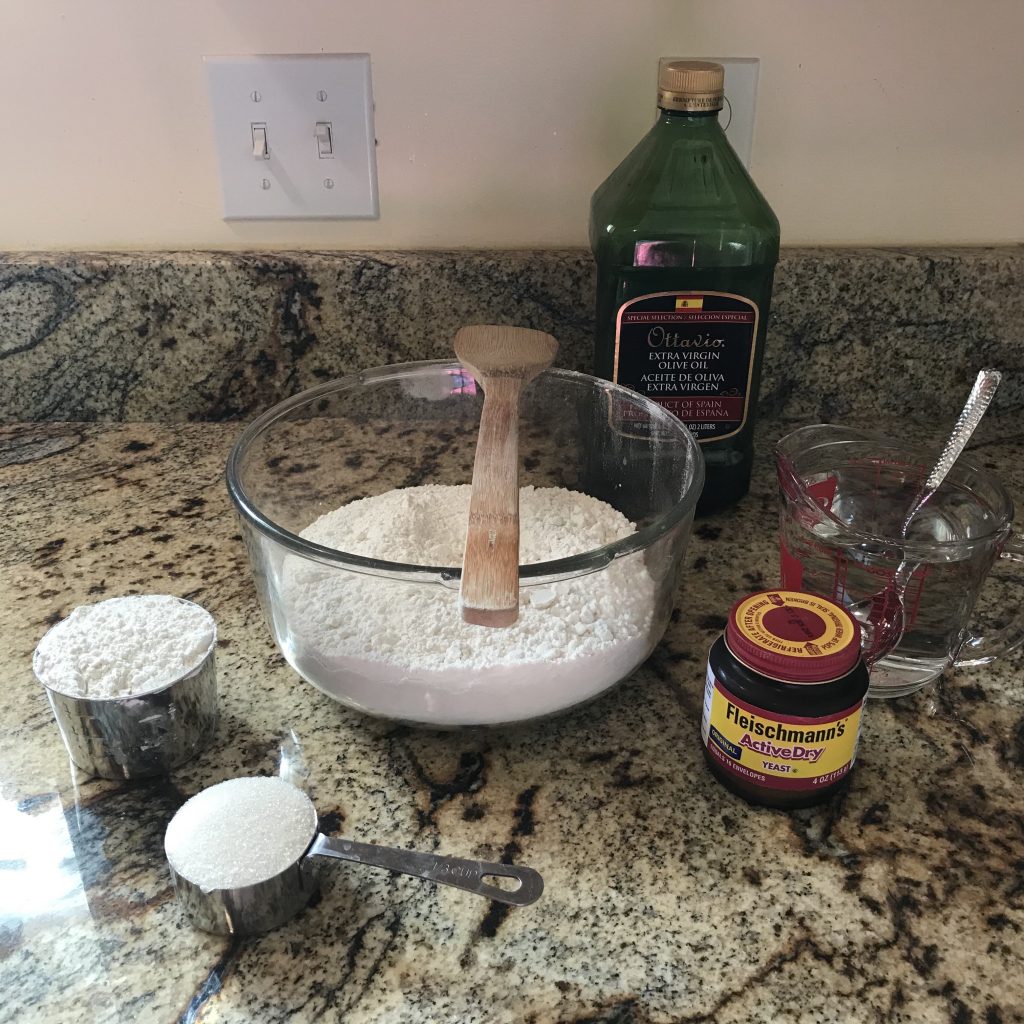
All ingredients ready to go. 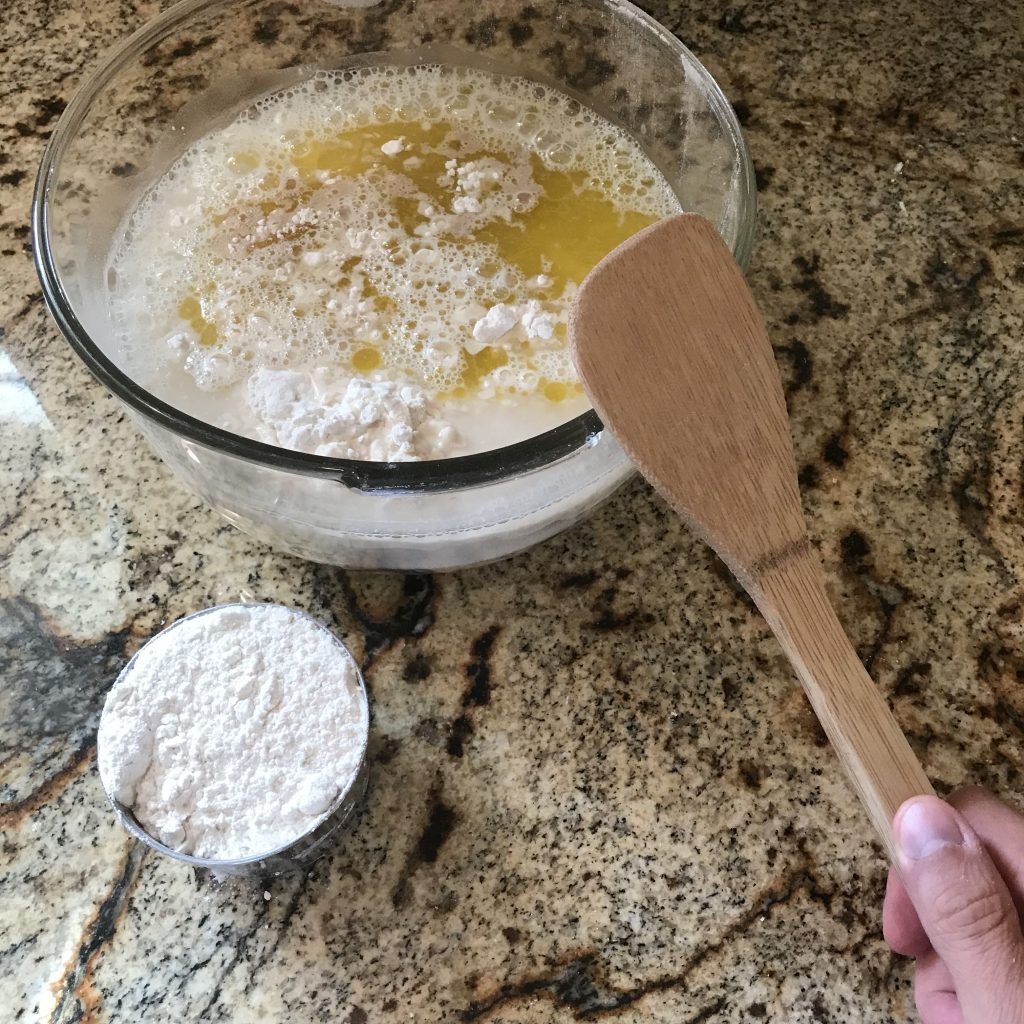
Time to start mixing.
Lastly, I add in about ¼ cup of olive oil. Of course extra virgin olive oil does add a bit of flavor, so you might prefer a more neutral oil like canola or avocado. In keeping with the “very forgiving” theme of this exposition, nobody has ever complained about an olive taste in their toast with jam. All together, I call this “three pounds of dough” and each loaf is going to be about a pound and a half, maybe twenty ounces. Isn’t that what you end up getting if you buy a loaf of sliced bread? It’s been a long time since I bought one, but I think they come 24 ounces or so.
Once I have everything in the bowl, I mix the ingredients up to make a wet dough. I’m not thinking about any smooth consistency at this point, I’m just trying to get things loose enough to mix with a stick, eventually firm enough to work with my hands without getting the stuff stuck to me, and lastly I’m thinking about getting all of the material out of the bowl and onto the counter. There’s no reason to waste any material, and one trick I’ve found is to put dry flour on the wet spots and rub it in to clean off the sticky spots from the bowl.
There’s no real magic to kneading. I just kinda push it forward with the heel of my hands, and then pull it back. Once it starts to get more mixed up I start doing this alternating left hand / right hand movement, and that’s not magic either. I’m just trying to keep the dough moving and worked in a bit faster. For sandwich bread I’m not trying to use any “high-hydration” technique. I just want it to be smooth and pliable, and I don’t want it sticking to my hands or to the counter too much. A little sticking maybe, but not too much. It’s kind of hard to explain in words; it’s really a feel thing. Also, the longer you work it over, the more it feels smooth and elastic. This is the action of the water combining more and more thoroughly with the dry particles of flour. So I can’t really tell you how long to knead it. I have read some recipes that say 10 minutes, and I think that’s much longer than I do it—those authors are probably trying to make sure you knead it long enough when you don’t know what you’re feeling for. I think you’ll feel it, and you’ll say “Oh right, I can see what Glen is talking about. Now it feels ready.”
Now it is still a bit sticky here, so I’m going to do a couple things to keep it under control for the next parts. First, I’m going to put a little “bench flour” down and create a dry skin on the lump of dough. I leave the dough sitting on a little piled-up flour to make sure it doesn’t stick to the counter. Next, I need to put the dough in a mixing bowl for the rise. I like to take the same mixing bowl and wash it out. I use the hottest water I can stand, because it will dry faster and because the heat helps the yeast work.
Oh, I didn’t say anything about how the yeast works, did I? Let’s step aside for a second and talk about principles. If you made a lump of dough out of flour and water, you could get exactly to this point and maybe not tell the difference. But the thing would be just a blob of dense dough, and it would not bake up into bread no matter how long you left before baking. To turn it into bread, it needs the yeast to make it rise. Some of you will think this is obvious, but I think maybe not everybody knows this. Some kind of leavening is needed to make the loaf fluffy and not solid. That is actually true in pretty much everything you bake out of flour, including cakes, cookies, and donuts. In the case of cakes and cookies, you normally use baking powder to form a chemical reaction that produces bubbles and fluff up the cake to make it light and spongy. For bread, usually the leavening agent is yeast, which is a kind of bacteria. Don’t worry, yeast isn’t going to make you sick, and it’s actually very healthy for your gut microbiome. It’s not a bad bacteria, like E. coli or amoebic dysentery or anything like that! It has been used for thousands of years and is absolutely safe and innocent. The yeast is actually going to consume the sugar you added, and it’s going to emit gases, especially carbon dioxide and some small amount of alcohol. Those gases are going to get trapped in the elastic structure of the dough, and that’s how bread gets fluffy. As it happens, the heat of baking initially makes the yeast even more active, but then it gets too hot and all dies out, which is why bread stops rising when you’re done baking it.
There are a few variables you can control to affect the texture, density, and the “crumb” of the inside of the bread, as well as the crust. That is actually where a lot of the skill and art of gourmet breads comes from. Some of the things you can change are the amounts of different ingredients, esp. yeast, sugar, and water; baking time and temperature, rising time and temperature, kneading methods, using different flours, different flour grinds or different grains, adding things like eggs or milk to the dough, etc. To make sourdough, you prepare an entirely different kind of yeast and ferment it over several days or weeks before it is ready to mix into the dough. But that’s an advanced topic, and I encourage you to look into it but let’s master this basic sandwich bread first!
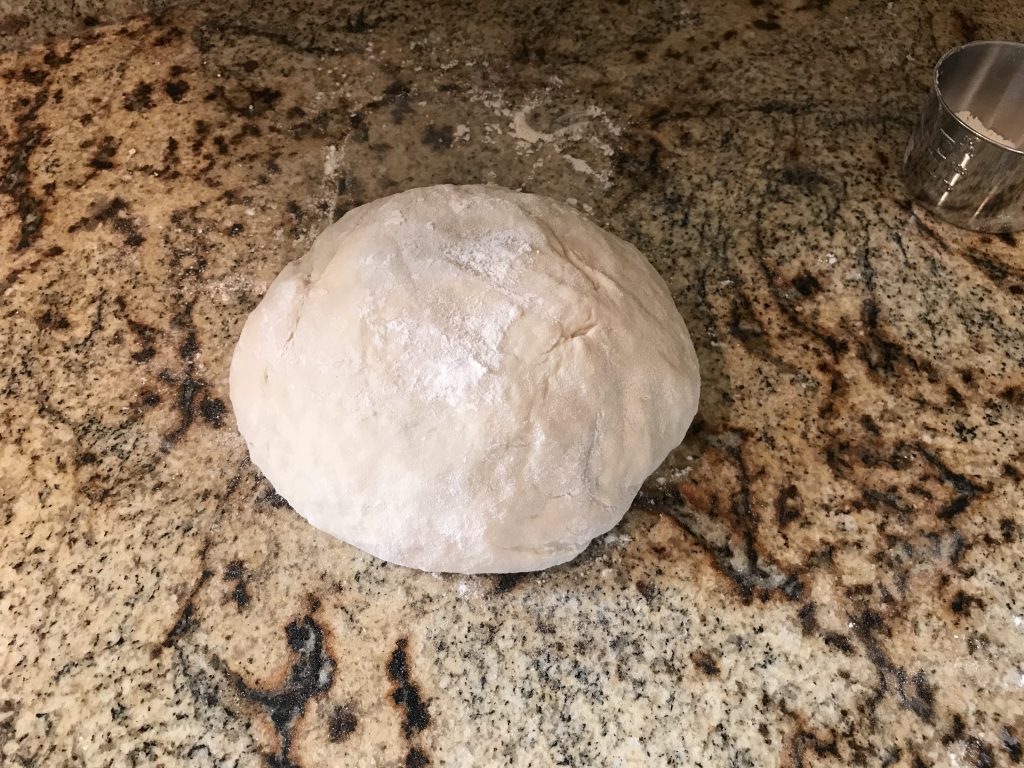
Floured dough 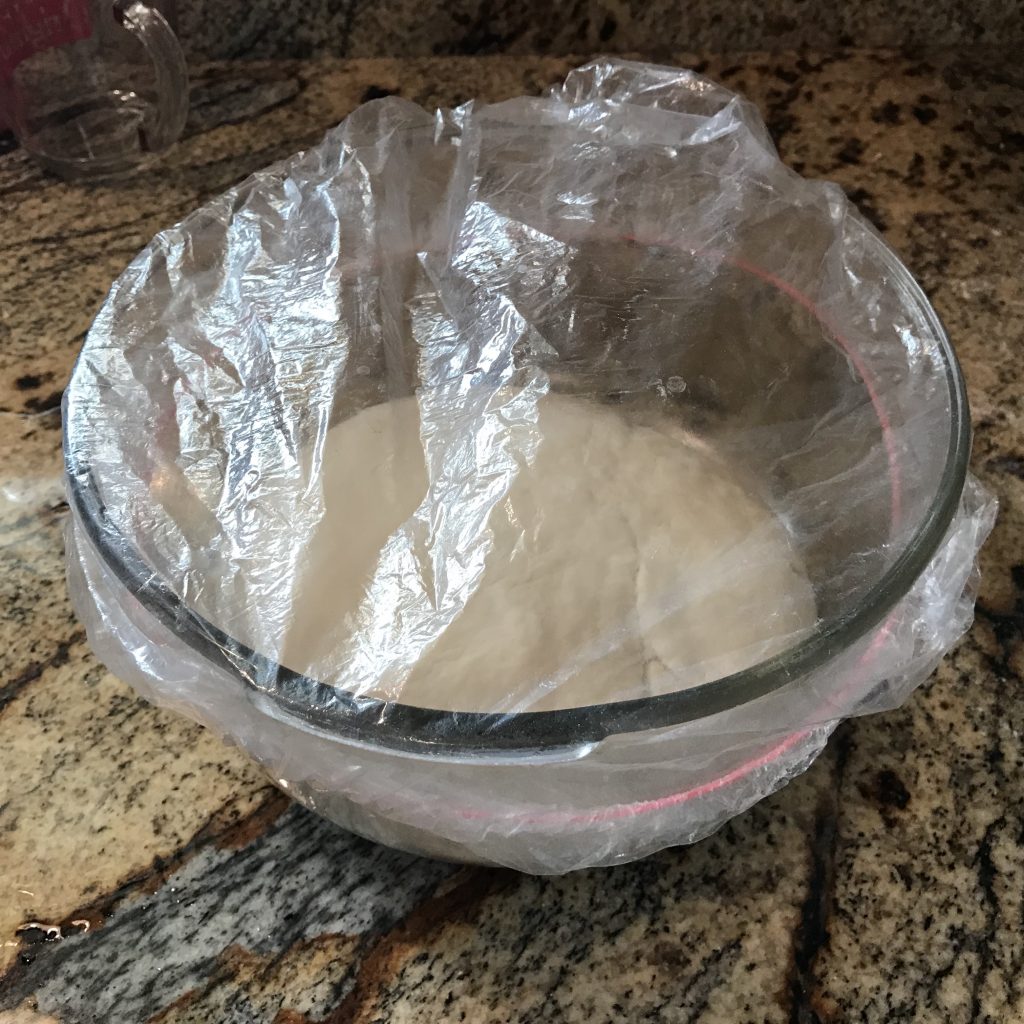
These “shower caps” are really handy.
Anyway, this bowl is dry and warm, so we can put the dough into it to start what is called the first rise. I add what I call “50 cents” of olive oil, which means about the diameter of a half-dollar coin. Then I drop the dough in, and roll it around to get the oil all over it. Remember we coated it with dry flour to give it a skin, and now we’re putting oil on it, and all together this is going to help it not stick to the bowl. I also found these stretchy “shower cap” deals at Target, and they’re kind of handy for keeping it covered. (They also wash in the dishwasher.) But you could cover it with a towel, or plastic wrap, or whatever you like. So put this dough in a warm place and leave it until it’s double in size, about 1½ hours. And any leftover flour? I throw it back in the bin if it didn’t get wet, but you can throw it out if you don’t think that’s a good practice.
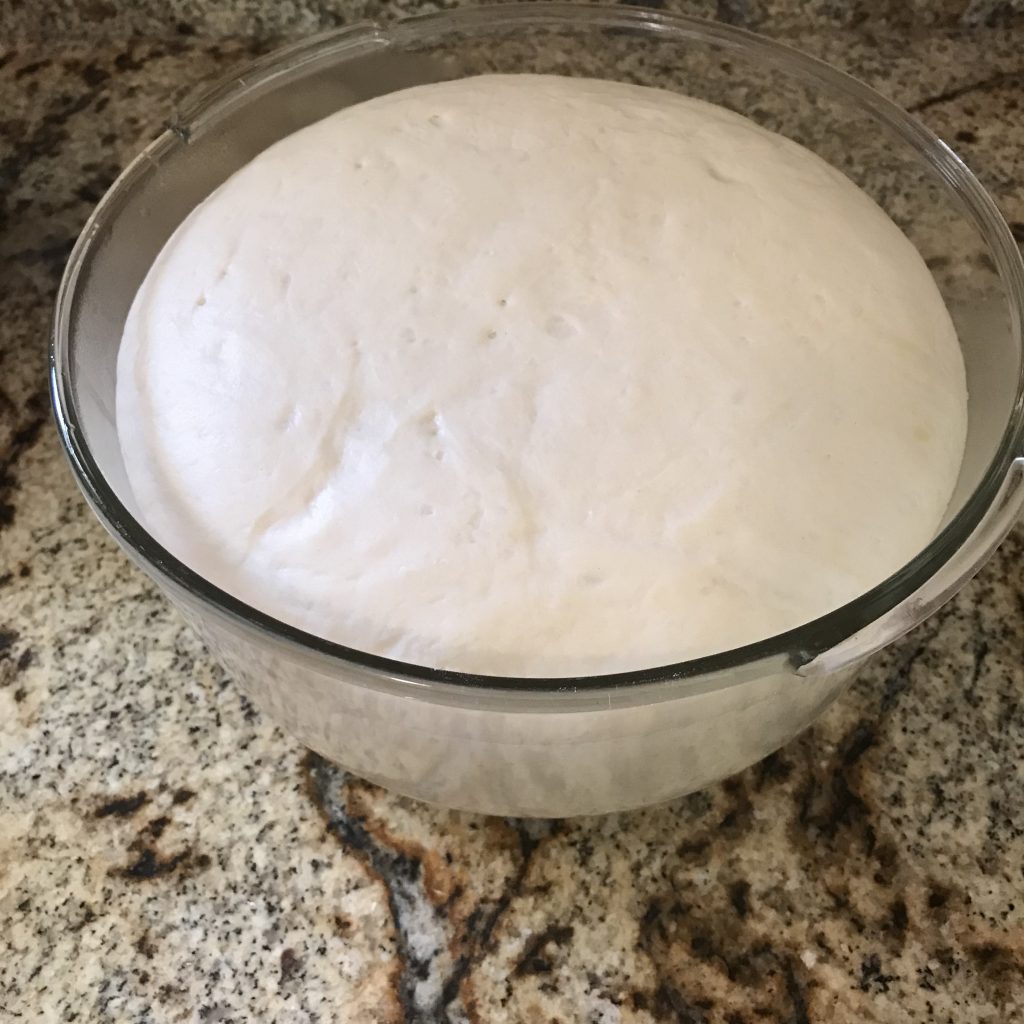
Okay, so now we’re back, and you can see the dough has doubled up. That’s because the yeast has eaten a lot of the sugar and produced gases which are trapped in the elastic dough, and that puffed it up. So the next thing we’re going to do is knock it back! That sounds pretty counterintuitive, right? Because why did we wait so long for it to puff up, only to squeeze it back down to size? The reason is that there are many microscopic holes in the dough now, but there are also some big bubbles, and we want to reduce the number of big bubbles while keeping the tiny ones. The big bubbles will produce cavities in the bread, almost like a Swiss cheese, and that’s just not what we’re going for in a sandwich bread. You might want it in certain artisan breads, but not here. So we’re going to knock the dough back. While you do this, listen for the snapping and burping sounds as the bubbles break. At the same time, I’m going to cut it in half to put it into the two bread pans. I usually use a kitchen scale to make the division equal. Let’s see, looks like these are each about 27 ounces. Big boys!
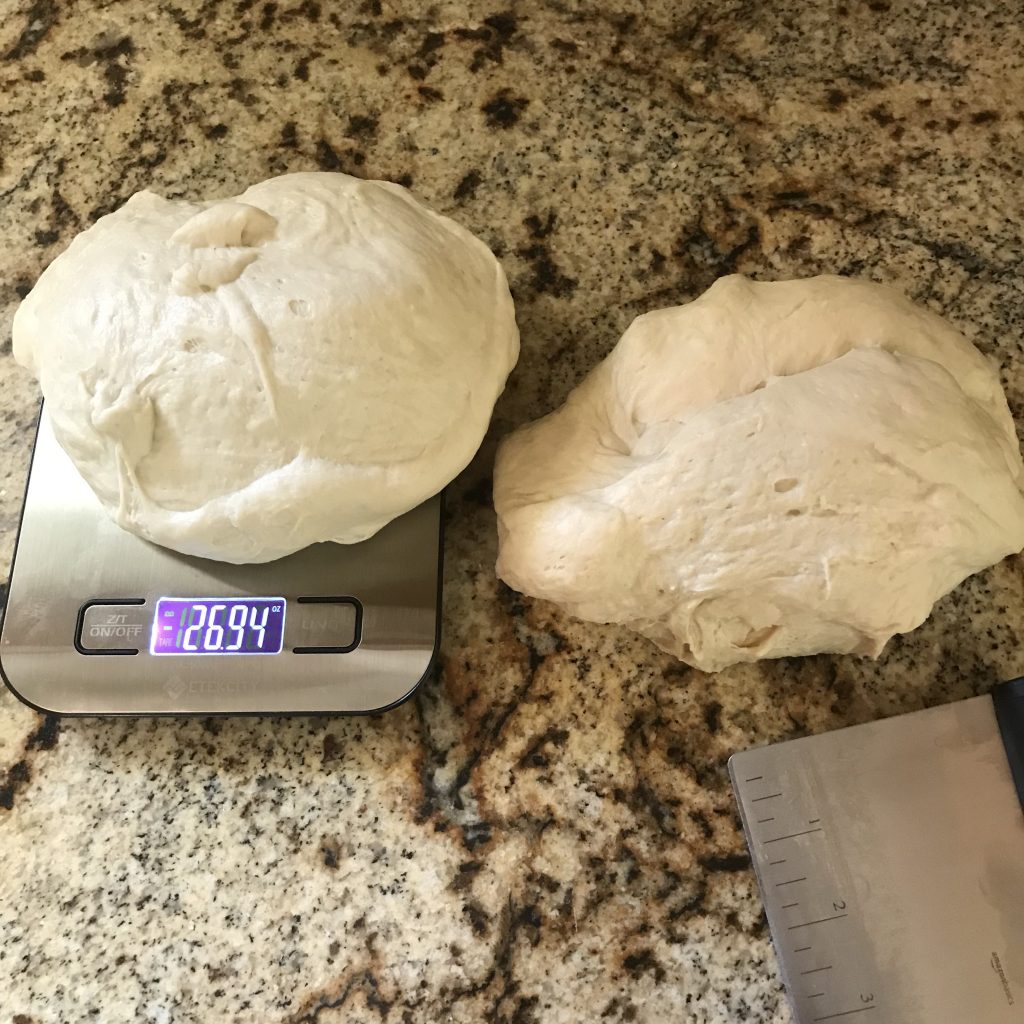
Okay, so once I get them divided up I start rolling them around to try to squeeze out big air pockets, and at the same time I will shape them into long lozenges to drop into the bread pans. I use a similar technique as before while kneading, only this time I try to shape the final product long to fill up the length of the bread pan. You’ll figure out how to do this, it’s not really that important what technique you use. If you work these a really long time you could start collapsing the good microbubbles too, but don’t worry about that too much; more will form on the second rise also.
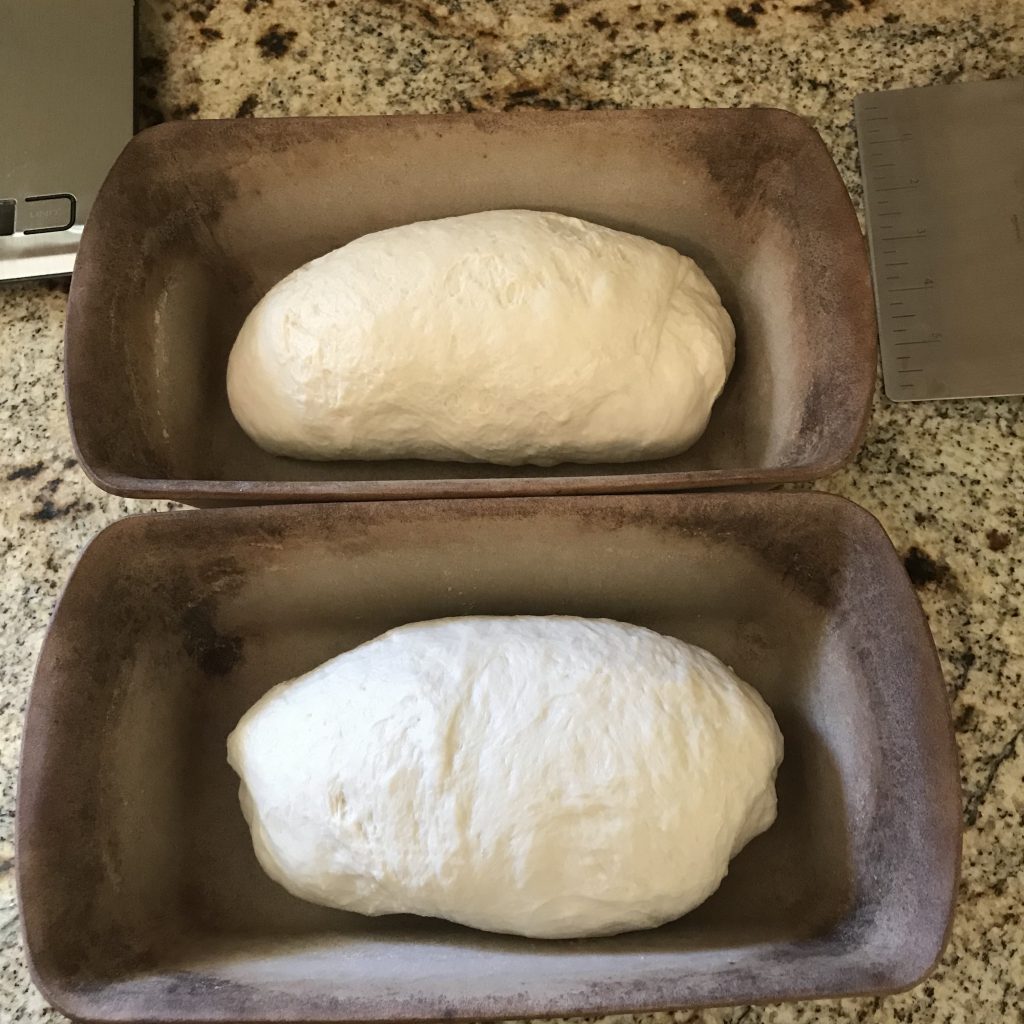
So now I’ll put them in the cold oven and cover them with a towel. You can turn the oven lamp on to keep it warmer in there and help the yeast work a bit more, but it’s not necessary. Sometimes I want to hurry things along especially if I’m a bit short on time, but most of the time I just let it do its thing. I do find that the bread tends to develop better flavor if you give it full time without heat accelerating it, but the effect is subtle. So let’s leave this alone for about an hour, and then come back to see what it looks like.

There, you can see it definitely rose up again. I think I mentioned this already, but it will puff up even more at the beginning of the bake, until it gets too hot and the yeast all dies out. Now since these pans are already sitting nicely in the oven, I don’t usually preheat, but that means you’ll want to experiment how long you need to bake for because it’s not precise that way. The strict recipe is that you should bake at 350 for 30 minutes. In my case, I’ll turn the oven on and leave it for 45 minutes, which has been pretty reliable for me. But if you do it like this, don’t forget to remove the towel! I’ve done that one maybe 10 years ago, and fortunately didn’t burn the house down, but that towel turned all black and the bread didn’t bake right. I felt really stupid, so now I make sure the towel is in my hand while I’m setting the timer. Okay, let’s come back in 40 minutes and see what we’ve got.
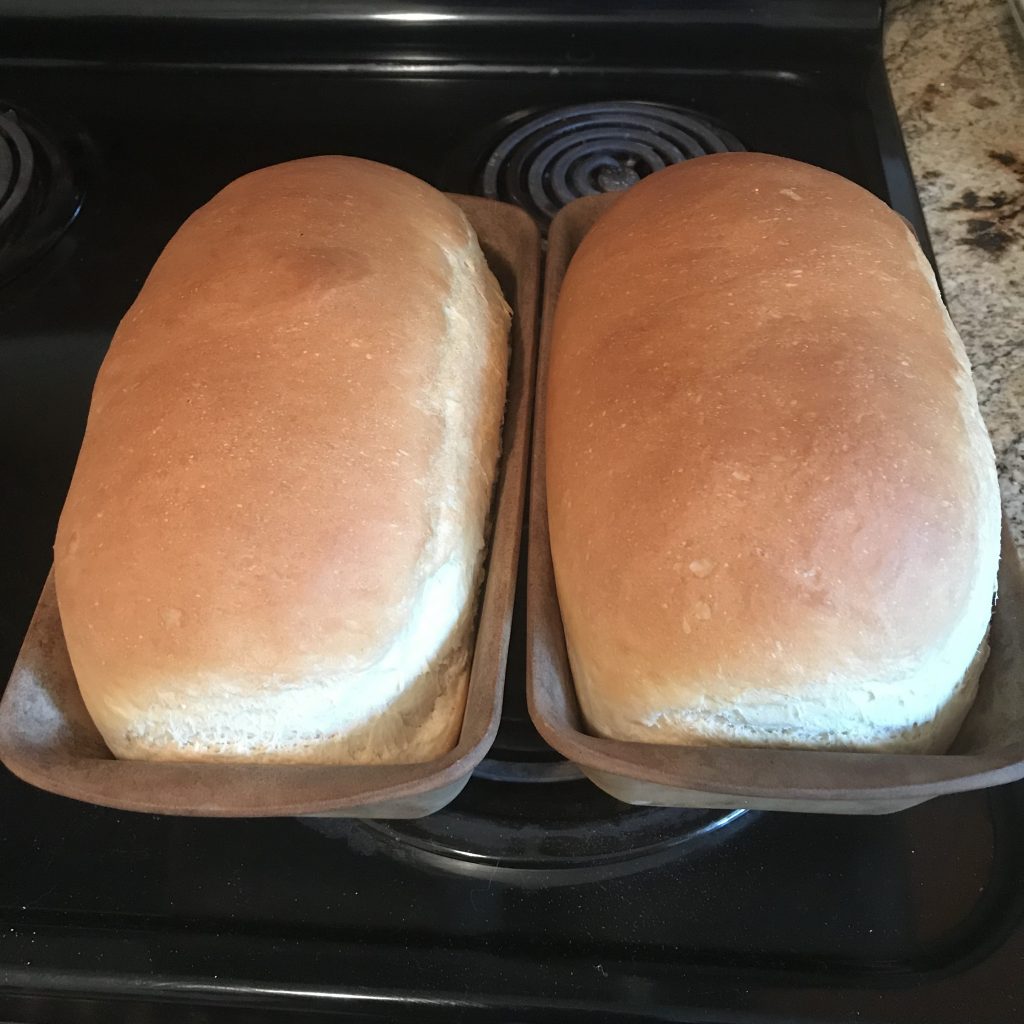
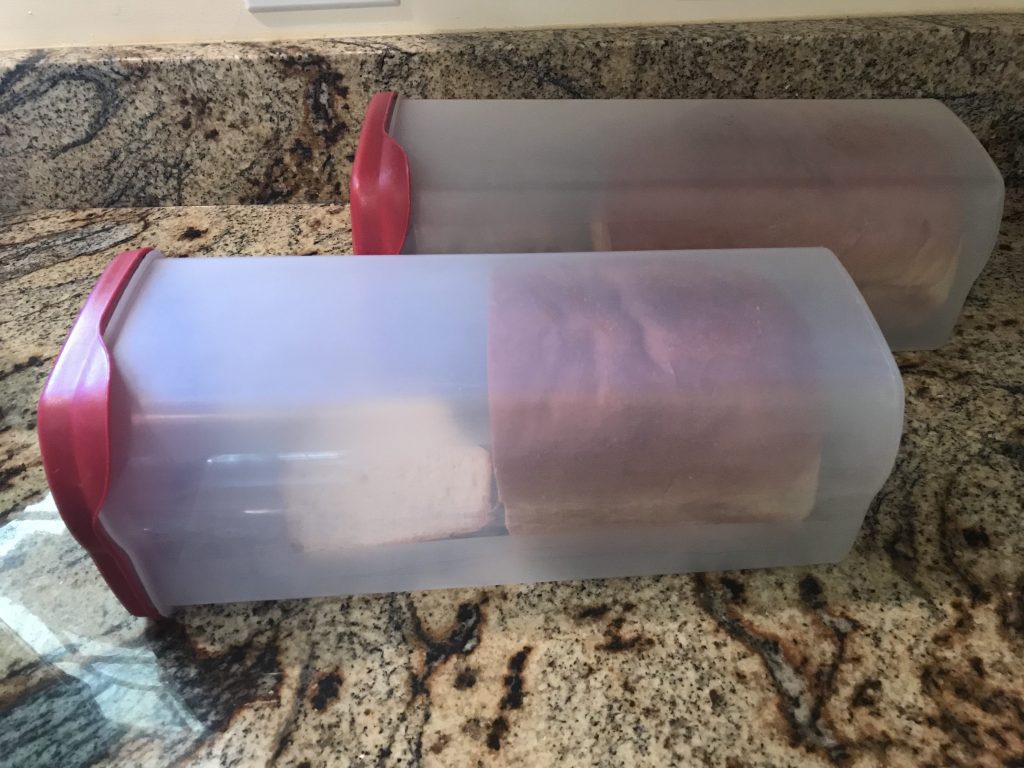
So look at that! Those look pretty good, and you I can tell you the bread smells fantastic, you can smell it throughout the house. Let’s put them on cooling racks and cover them up. You can probably take them out after about a half hour, but they’ll be cooler and easier to handle after a full hour. I’ll transfer them to these Rubbermaid bread boxes. Unfortunately I don’t see these exact boxes for sale any longer, but many similar products exist. I definitely recommend an air-tight plastic container to keep pests away and because this bread has no preservatives in it and will begin mouldering after only four or five days. Most of the time I’ll put one of these containers on the counter and the other in the freezer. Although the kids are going to be over this weekend, so I’ll leave them both out because it’ll be gone before Sunday.
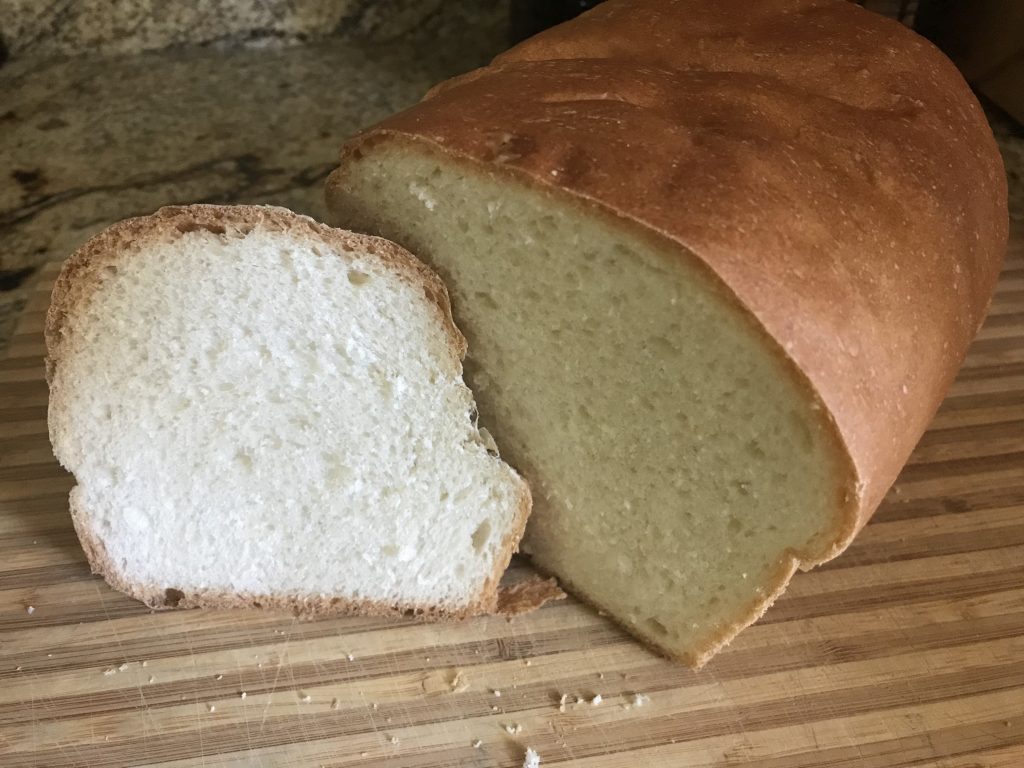
Okay, let’s take this out of the pan and cut it open. I sometimes take a metal spatula and separate the bread from the pan if it’s tightly wedged in, but it looks like this time it’s coming out easily. Okay, let’s cut into it and see what we’ve got. See how it is very uniform in texture, with no big holes or maybe just a few. You can see how I could spread mustard or jelly on this and it wouldn’t leak out through the bread. It smells fabulous, and let’s give it a taste … oh, it’s good. I can’t share the flavor with you through a blog post, but that’s a quality product if I do say so myself! I guess you’ll just have to do it yourself to find out what it tastes like.
So there you have it, that’s the sandwich bread I typically make. People will occasionally still buy hotdog rolls or whatever, but for the most part this is all we eat here any more. Hopefully you can see it’s not all that much trouble to make; the biggest issue is time, but even then it doesn’t require constant babysitting. And as I said, this recipe is pretty forgiving, and if you let it rise too long it will still bake up fine and might even taste better. If you make this, leave a comment to let me know how it went, and if you have any ideas on variations or how it might be better, let me know that too.
Basic Sandwich Bread
Yield: 2 loaves about 1½ pounds (24 ounces) each
2¼ cups warm water
About 5 cups bread flour
1 Tbsp salt
1 Tbsp or one packet of yeast
⅓ cup sugar
¼ cup cooking oil
In a large mixing bowl, add 4 cups flour, and then all other ingredients. Stir with a wooden spoon until it forms a wet dough. Turn the dough out onto a floured surface and add flour little by little to make a dough that doesn’t crumble but also doesn’t stick too much to hands and countertop. Knead until smooth and pliable.
Coat the dough with flour and oil, and leave in a large mixing bowl to rise until doubled in size, about 1½ hours. Punch down the dough and divide in half. Shape each half into a lozenge and put in a 9-inch bread pan. Cover with towel and leave to rise again until the top of the dough is as high or slightly higher than the top of the pan.
Bake 30-35 minutes at 350. Remove from oven and cool about an hour covered with a towel on a cooling rack. Remove from bread pans and store in an air-tight plastic container up to 5 days.
Awesome post! Keep up the great work! 🙂