I had a crazy idea this week, which was based on an observation. Traditional Italian pasta seems to appear in many different shapes, often based on regional styles. Some shapes are extruded, many are rolled flat and cut into shapes (including pasta lunga such as fettuccini), some are shaped by hand. I wouldn’t know how to count traditional shapes, but it seems to be somewhere between 50 and 100.
But traditional pasta seems to come in only three colors:
- White: Southern style, made from water and flour (sometimes a semolina blend)
- Yellow: Northern style, made from egg and flour
- Green: Incorporates spinach to impart color
Of course tradition is not a static thing, and variations such as black squid ink pasta are growing in popularity and may be becoming traditional. There is also a tri-color rotini which seems to be reflecting the colors of the Italian flag and uses a tomato juice for red. But in the main, these are modern novelties developed by creative chefs, and not provincial staples of Southern European cuisine.
Since other colored foods are germane to Italy, it seemed very strange to me that other means of coloring pasta would not have become common traditions. The first thought I had was that perhaps it is much more difficult to color food with orange carrots or blueberries or whatever, than it is to extract dye from spinach. And I suppose that is what made me think to try dyeing pasta with beets.
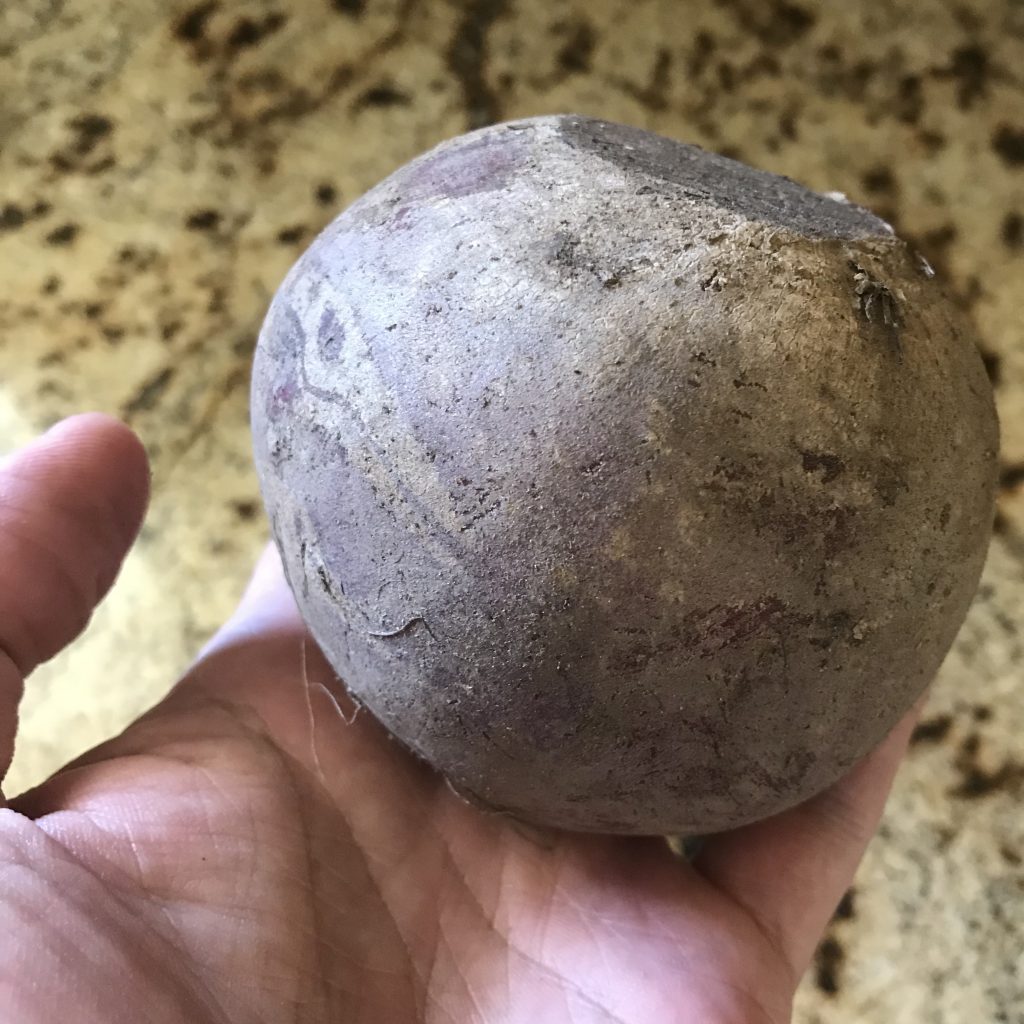
I am growing beets in the garden but they will not be mature until October, so I got this at the supermarket. One medium beet (about ½ pound) is probably enough for this recipe, but because I was in “experimental test kitchen” mode and failure was likely, I bought two large beets. This one is just under a pound.
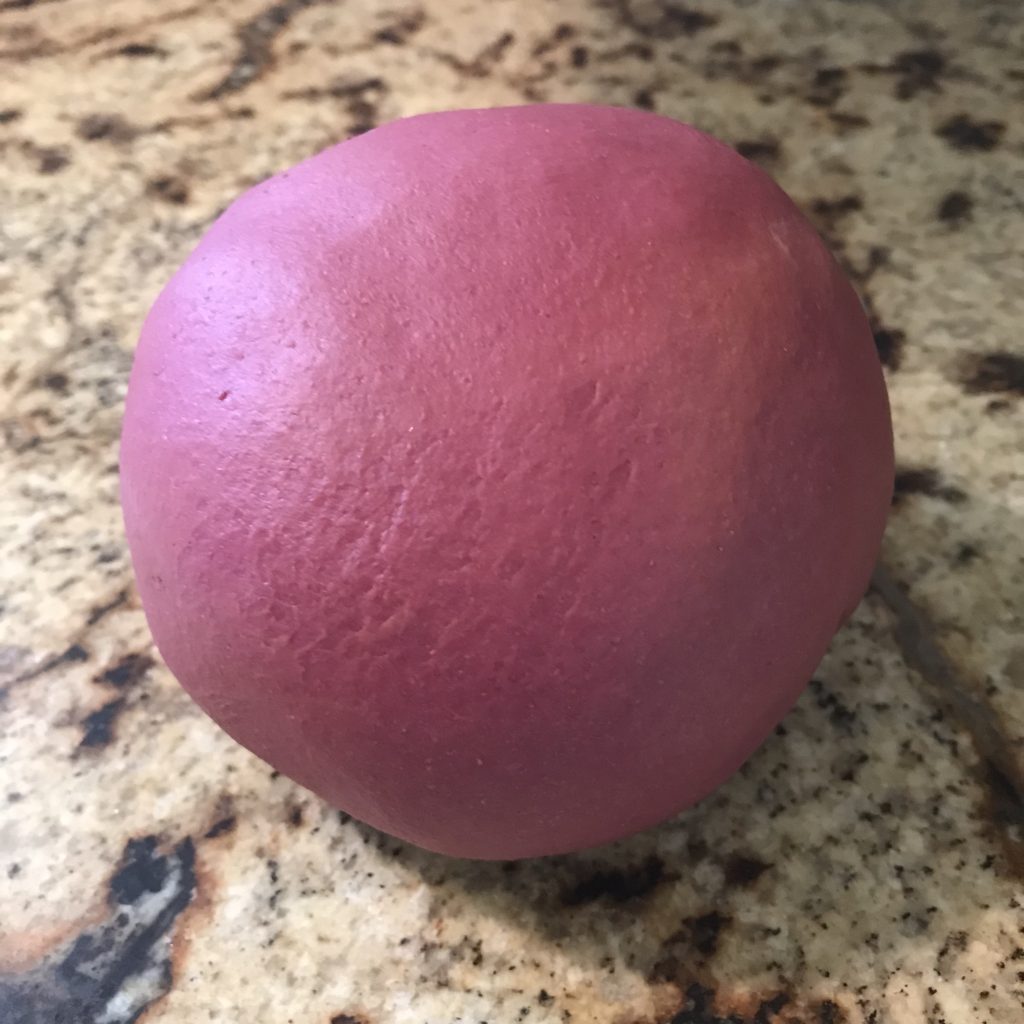
I used a potato peeler and removed the skin. Then using a sharp knife, I sliced it up very thin (less than ⅛ inch) and simmered it in a half cup of water for 15 minutes. Once it was tender, I dumped it in a blender and pureed it as fine as possible. Lastly, I separated the material into the liquid dye and the beet pulp by straining with a cheesecloth. The result was about a cup of very red liquid and maybe ¾ cup of very red pulp.

I knew this would be a difficult project, so these items sat in the fridge for most of a week until I had enough consecutive hours of free time to get started. Finally on Thursday, I made up the dough. This was 1 cup of semolina, 2 cups bread flour, 1 tsp salt, 2 Tbsp avocado oil, and all of the dye. I wanted the dough to be on the soft side, because for tortellini you have to be able to seal a pocket of filling by pressing two layers of dough together with your fingers.
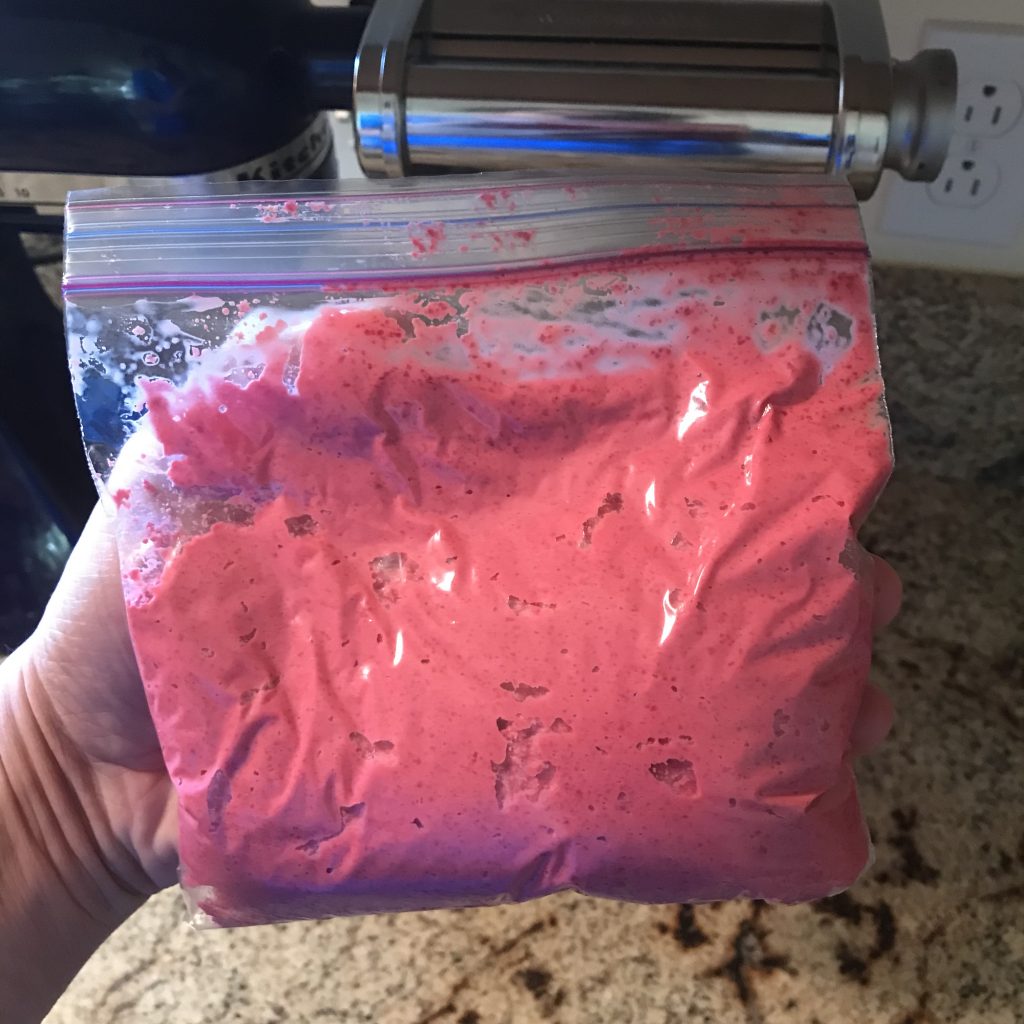
While this was resting, I made up the filling for the tortellini. In my original concept I was going to use walnuts, but I happen to have an abundance of cashews on hand, and I thought they might be tasty. So the filling was the beet pulp I had reserved, together with ½ cup ricotta cheese, ½ cup pureed raw cashews, and 2 Tbsp sun-dried tomatoes. It would have been helpful to have a serious food processor to do the puree, but I had to pulse my big blender, and to get the material to mix I added about ¼ cup olive oil. I put it into a sandwich bag, which I later utilized as a makeshift pastry filler by cutting one corner off, and squeezing the filling out like toothpaste.
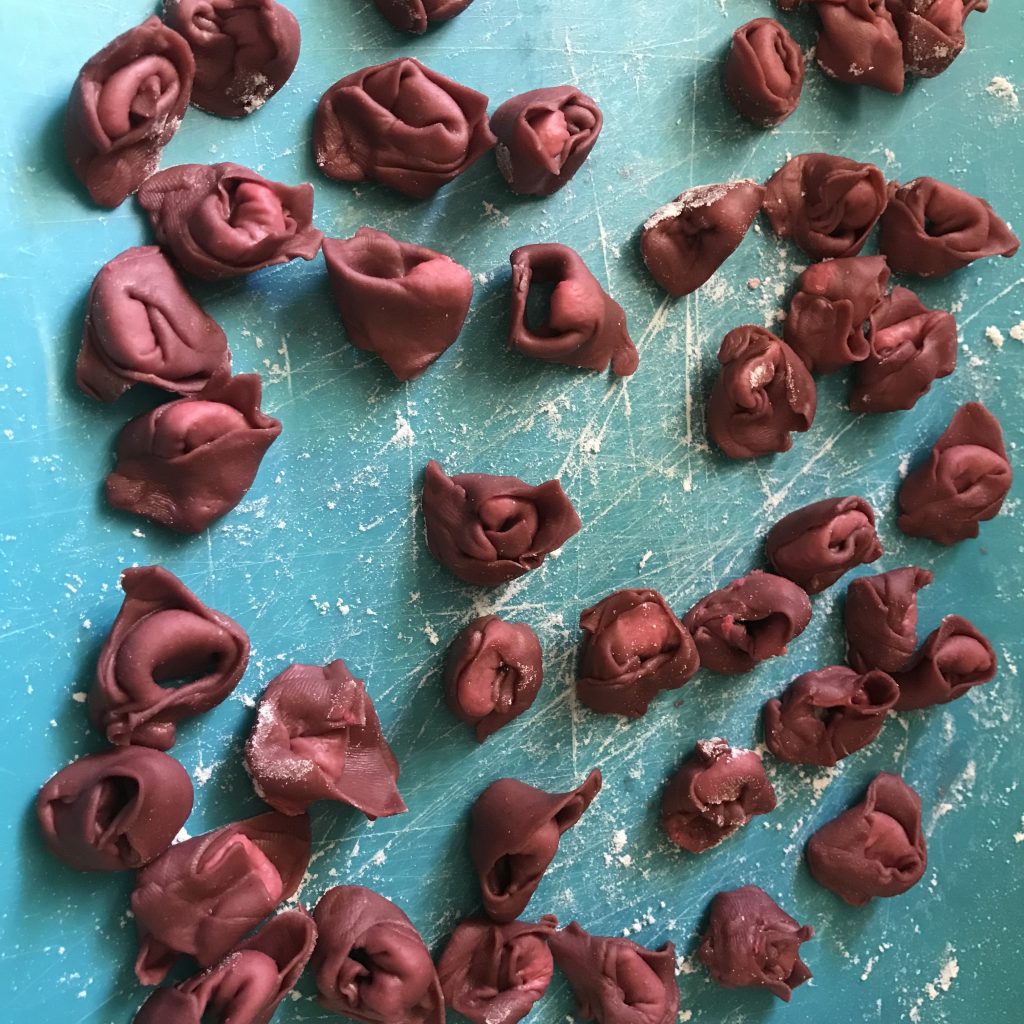
The first round did not go well. Turns out the dough was excessively soft and sticky. There was also a learning curve in figuring out how to form tortellini. Here’s some pics from the first round.
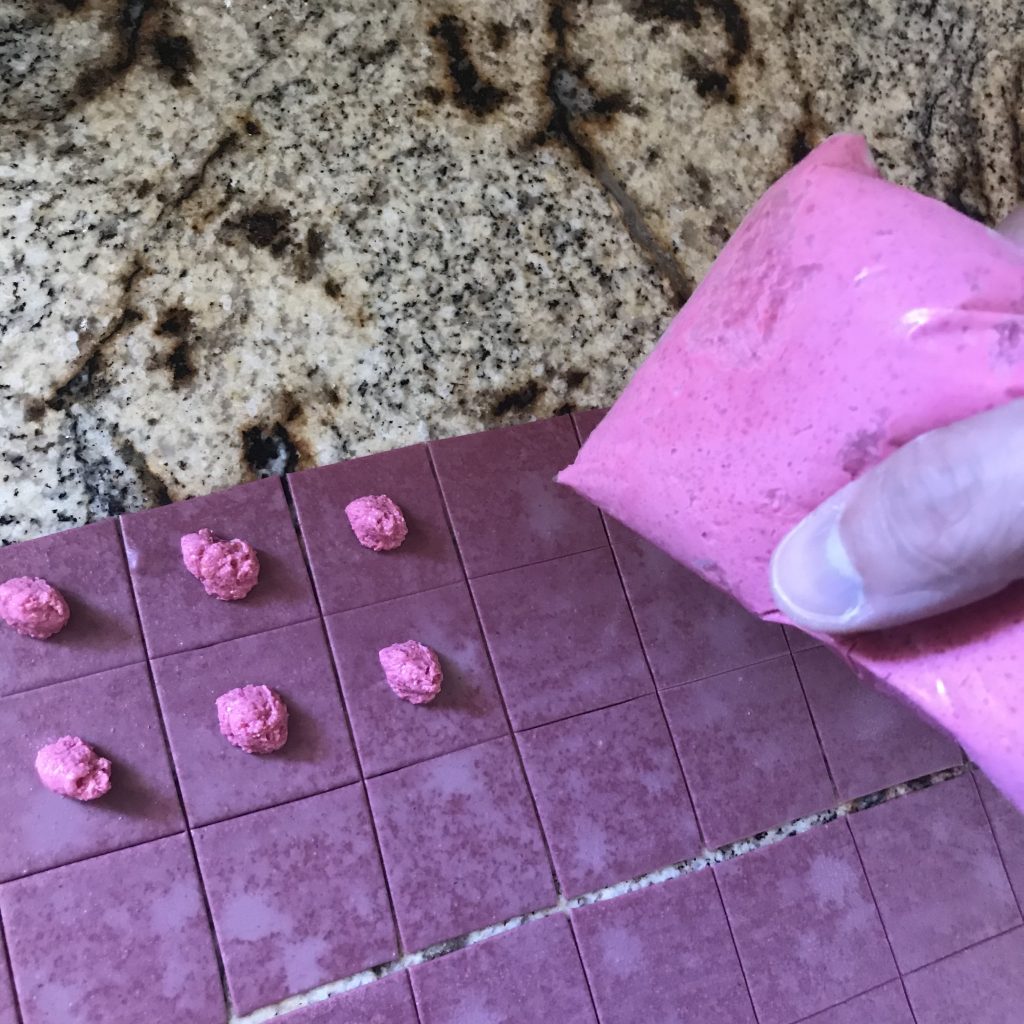
I have a Kitchenaid pasta roller that I used to make sheets of dough. My brother gave me a benchtop one with a hand crank, and I made a lot of pasta fresca with it over the past few years, but it wore out. (It feels like one of the gears has a broken tooth.) I have to say, using a motorized roller is nice! I rolled these sheets down to a thickness setting “6” (higher numbers are thinner, and the roller goes down to 8). I have heard people say you should roll the pasta “thin enough to read the newspaper through” but I assure you this dyed pasta was not transparent at all! It was thinner than a millimeter. I then used a wheel-style pizza cutter to slice the sheets into squares–I don’t currently have a bicicletta so it’s challenging to keep the lines straight. The squares are about 1¼ inch on edge.
It’s hard to tell but I had cut the corner off the filling bag and was squeezing the filling out in little dollops on the squares. And because forming the tortellini requires two hands, unfortunately I could not take pictures of myself forming them. But to summarize, you take the squares and fold them in half diagonally, pinching the ends together to form a sealed pocket of filling inside a triangle. And then you take the two far corners of the triangle and you bring them together around your finger and pinch them together to form a ring.
As I said there is a learning curve. The first fifty or so are poorly formed, partly because the dough was too soft and kept stretching and breaking, but mostly because my technique was poor. Even worse, the dough was so sticky that they all stuck to the blue plastic sheet and couldn’t be removed without ripping open. These all had to be discarded. I was close to despair, and considered abandoning the project.
I think under most circumstances, if I was determined to make pasta I would discard the dough and start over. But I had used all my dye, and I wanted to make red tortellini. So I attempted to knead in additional flour, to dry out the dough and stiffen it a bit. Generally speaking, I cannot recommend doing it this way. It is a serious pain! I sprinkled flour on the lump of dough and tried to work it in, but because it was already dry and stiff it did not go easily. It probably took five tries total, letting the dough rest a half hour each time, to get a half cup of additional bread flour kneaded in. And probably some water evaporated out of it while it was being kneaded as well. Eventually late Friday afternoon, the dough felt firm enough to try again.
There are a few tips I can offer anybody who might try this for themselves:
- Tortellini should never be too big. The squares are about 1 to maybe 1¼ inch across. The finished dumplings are maybe ¾ inch across.
- Don’t put too much filling on the squares.
- It helps to wet the dough with an atomizer after you cut it into squares. This keeps the pasta from developing a skin and helps the pasta seal when you press it.
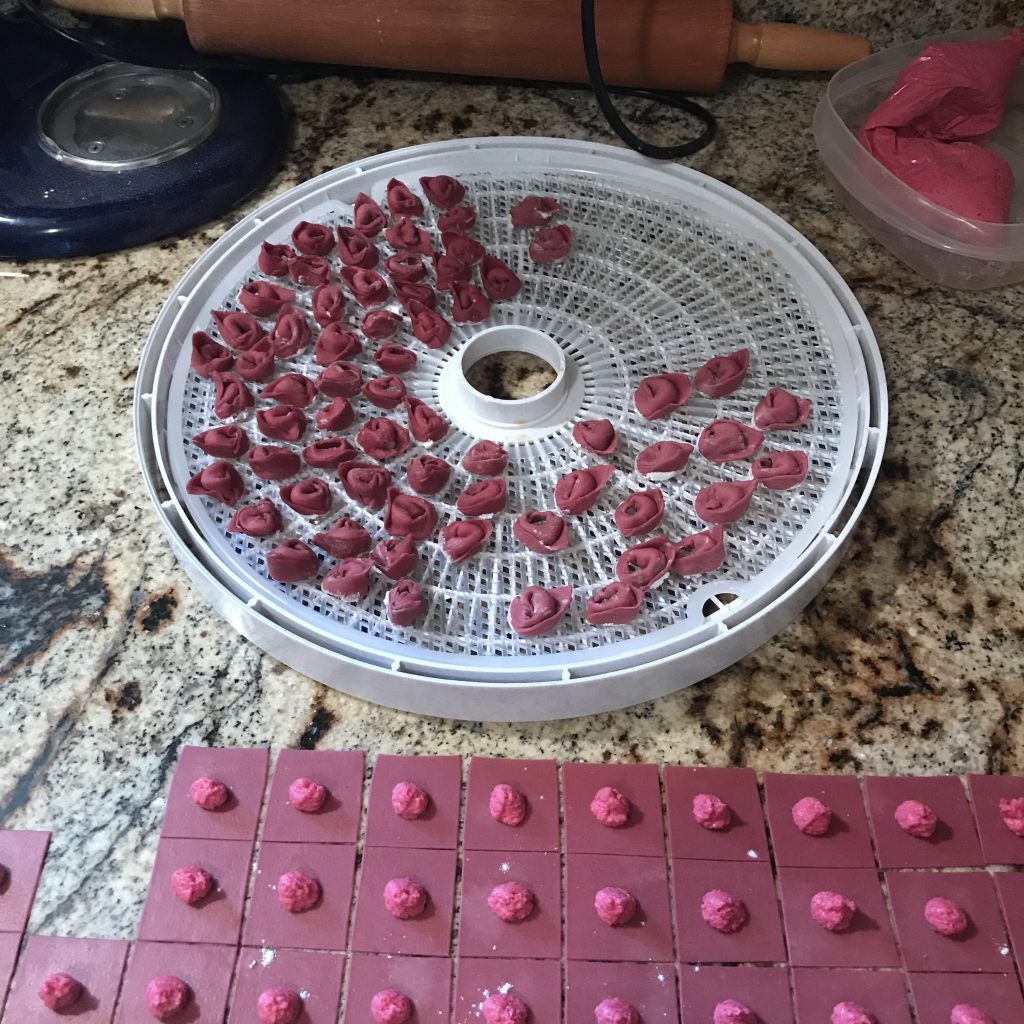
- I was worried about the tortellini sticking, so I dipped them in flour and dried them on a plastic mesh.
- After filling the whole tray, I put it in the freezer for about a half hour.
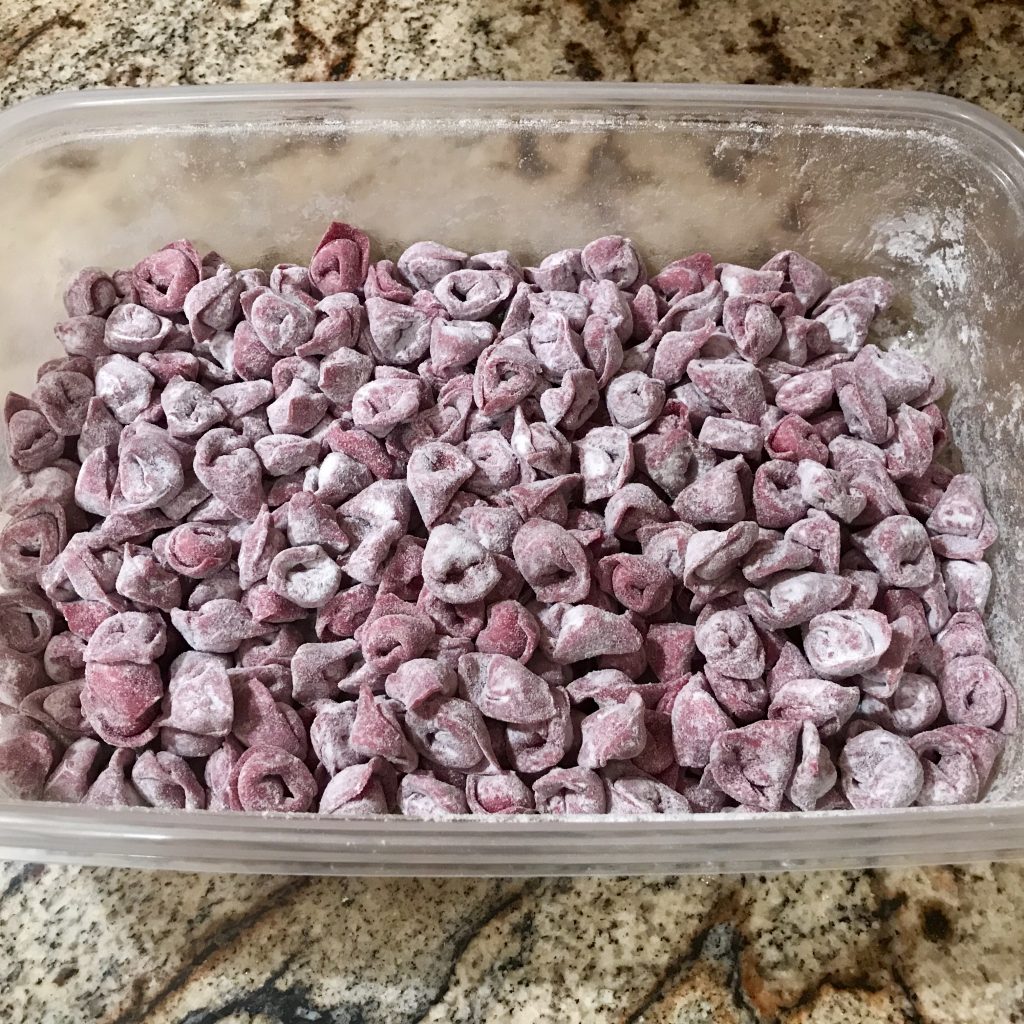
After all tortellini were made and chilled, here’s the lot of them, between 300 and 350 of them (note there would have been closer to 400 of them if the first round had gone better):
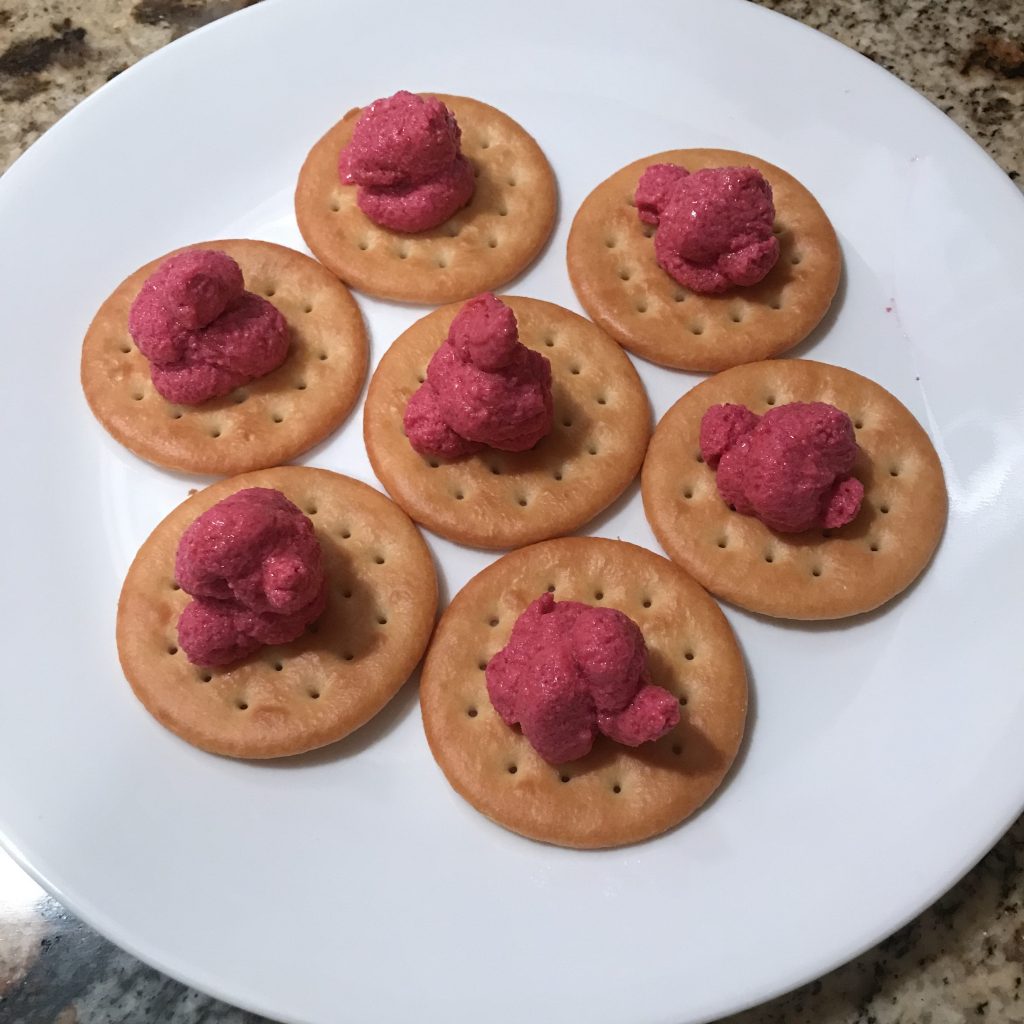
As it happened, I had extra filling at the end of this project, so I made some ugly hors d’oeuvres. They look weird and unnatural in this picture, and I can’t recommend them, with an excessively dry flavor. But they were my dinner, and it beats throwing the filling away..
Finally, Saturday was the moment of truth. I brought them to a little dinner get together hosted by a friend, who also made a nice chicken broth by Ciao Italia. I rinsed the excess flour off the tortellini and simmered for 6 minutes in the broth. We gave each person exactly 40 tortellini, and it was a perfect portion size.
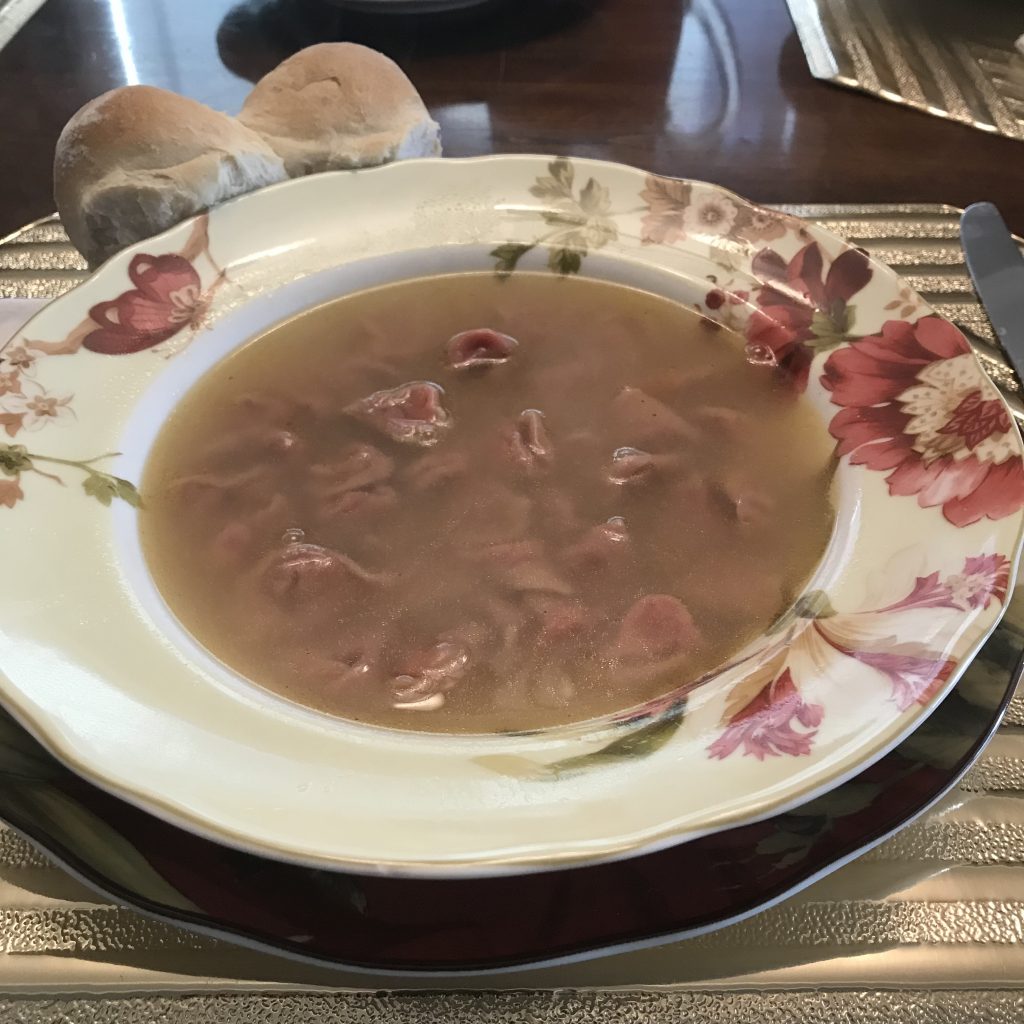
I have to say this was delicious, and I think the tortellini was a big part of that although the broth was absolutely one of the best I’ve tasted. (The cook admitted that an ordinary chicken was used and not a capon, but I remain very impressed.) As you can see, some of the beet red color was lost in the cooking. The soup was savory and delicate, and it came together wonderfully with a little sprinkled Parmesan cheese to form a meal that was light but still hearty and satisfying.
Beet Tortellini
Yield: Approximately 400 tortellini; enough to serve 10 people
Dye and pulp:
1 large beet (¾ to 1 pound)
Skin the beet with a potato peeler and slice thin (⅛ inch slices). Simmer about 15 minutes with ½ cup water over low/medium heat until tender. Puree the mix in a blender or food processor, and extract the dye from the pulp. Reserve both dye and pulp for recipe below. The dye (yield about 1 cup) could be used to color other foods instead.
Pasta:
Beet dye from above (water-based, about 1 cup)
1 cup semolina flour
2½ to 3 cups bread flour
1 tsp kosher salt
3 Tbsp avocado oil
This is a straightforward pasta recipe. Heap the dry ingredients on the counter and make a crater. Pour the wet ingredients into the crater and slowly blend with a fork at first, and then with hands. Knead at least 15 minutes until fully blended into a dough ball, and let rest for about 30 minutes before proceeding. (This is a good time to make the filling, as described below.)
The dough can be rolled out with a rolling pin or in a pasta rolling machine / laminator, to about 1 mm thickness (“thin enough to read the newspaper through”). On the Kitchenaid pasta roller, I worked it down to setting #6. It helps to use heavy bench flour on the bottom to prevent sticking. Then cut into 1 to 1¼ inch squares. You may wish to spray the pasta with water to prevent it from forming a skin and drying out as you apply the filling and form the tortellini.
Apply small dollops of filling (see below) to the centers of the squares with a pastry bag. The diameter of the dollop should be about ⅓ the length of the square. To form the tortellini, pick up the square in both hands and fold corner-to-corner to make a triangle, and pinch edges together to seal the filling into a pocket. Try to press out all air as you seal the pasta. Once the triangle is formed, bring the two far corners together wrapping the tortellino around your finger, and pinch the two arms together to seal the pasta into a ring. Lightly coat the pasta in dry flour and allow to dry on a mesh surface, taking care to minimize the chances of sticking. The tortellini can dry in the air up to an hour, but should be used or frozen promptly.
Filling:
Beet pulp from above (about ⅔ cup of pulp)
½ cup raw cashews, pureed
½ cup ricotta cheese
2 Tbsp sun-dried tomatoes, pureed
¼ cup extra virgin olive oil
This is simple: Add the ingredients minus the olive oil to the blender or food processor, and pulse until blended smooth. Add olive oil 1 Tbsp at a time as needed to aid the blender in working the ingredients. Once smooth, spoon out into a pastry bag and store (up to a week) in the fridge. Keeping the filling chilled while using helps maintain a thicker consistency which in turn makes it easier to work with.